The Watch List Builder page is used to create groups of Data Points to display on the Watch List page. A Watch List at its most basic can be a group of Data Points you arbitrarily choose from your system. A more complex Point query based Watch List can include Parameters and RQL queries, which allows you to create Watch Lists that respond to system structure and user interaction with Parameter values.
When you first create a Watch List you will need to set a Name before saving. An Export ID (XID) for that Watch List will automatically be assigned if you don't set one. Read permission will automatically be set to user and Edit permission will be set to edit-watchlists.
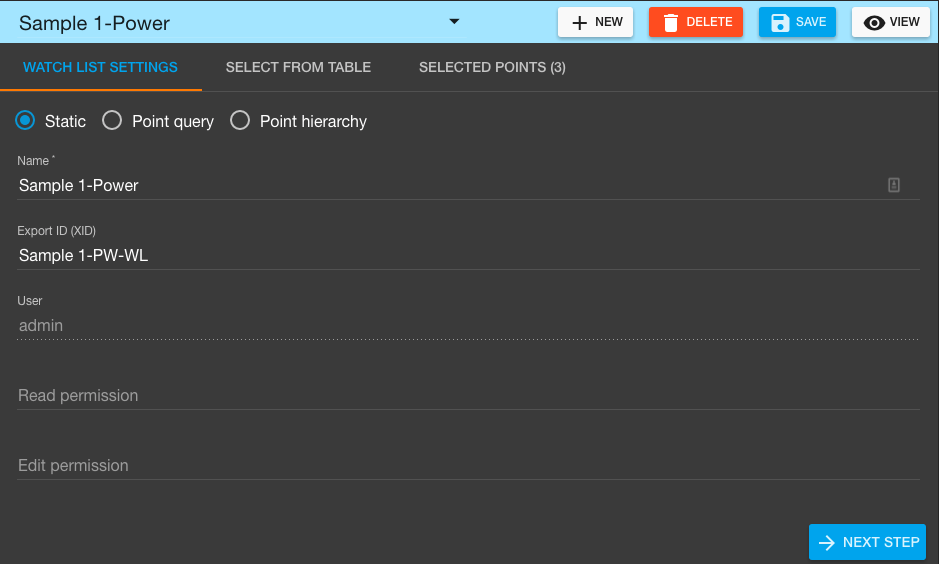
The dropdown, to the left in the header at the top of the Watch List Builder, allows you to pick a Watch List to edit. To create a new Watch List click the New button. The Delete button will remove a Watch List from the system after confirming. At any point a Watch List can be saved with the Save button and viewed on the Watch List page with the View button.

The three type of Watch Lists currently supported are Static, Point query, and Point hierarchy.

Static Watch Lists
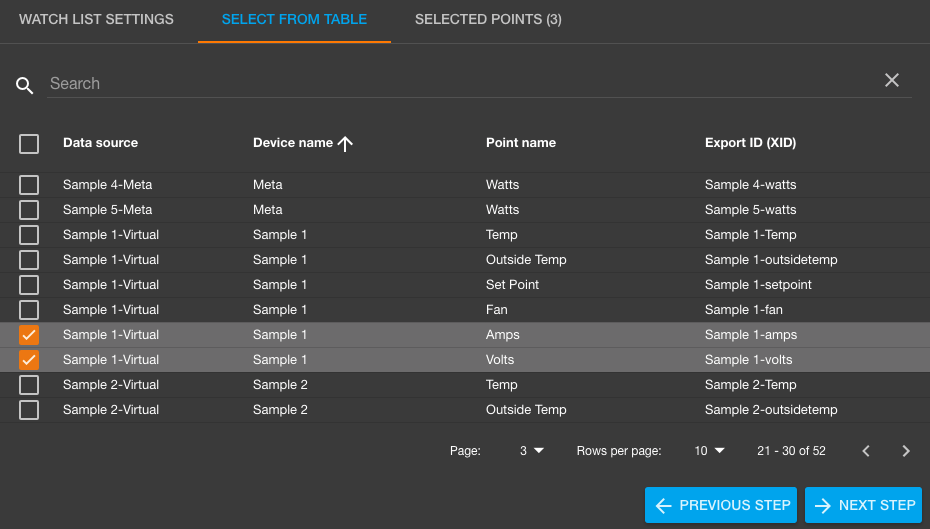
Watch Lists of type Static allow you to manually select from any of the Data Points in the system. The table on the Select From Table tab allows you to filter by searching. Multiple data points can be selected and the top checkbox will select / deselect all rows currently viewed. Checked rows will be added to the Watch List. You can view more rows at a time and tab between pages using the controls below the table.
Any checked Data Points will show up on the Selected Points tab. From this tab you can remove any Data Points from a list by selecting the checkbox for each and then click the Remove Selected button.
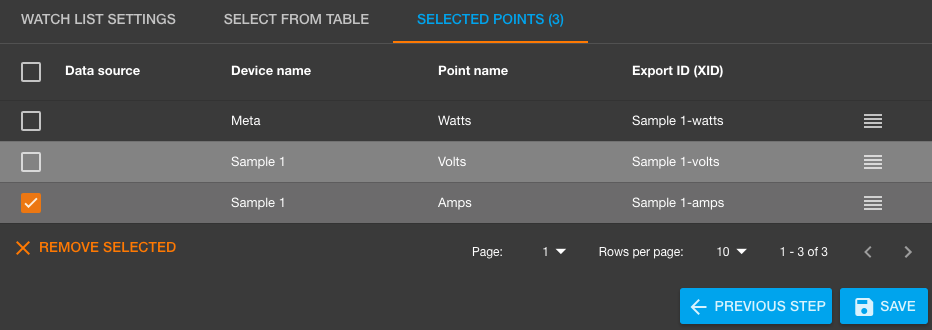
You can also reorder how points will display on a Watch List by dragging and dropping the 3 Dashes icon up and down.
Point Hierarchy Watch Lists
The Point hierarchy type of Watch List allow you to pick points from a hierarchical folder structure regardless of their data source or device name.

The Point hierarchy set in your system will display under the Select Folders tab. Clicking the checkbox next to a folder name will include any Data Points contained by those folders in your Watch List.

Point Query Watch Lists
A Point query based Watch List can include Parameters and RQL logic allowing you to create dynamic Watch Lists that will give a different set of data points depending on the state of your system and can be updated from the Watch List page view by changing Parameter values.

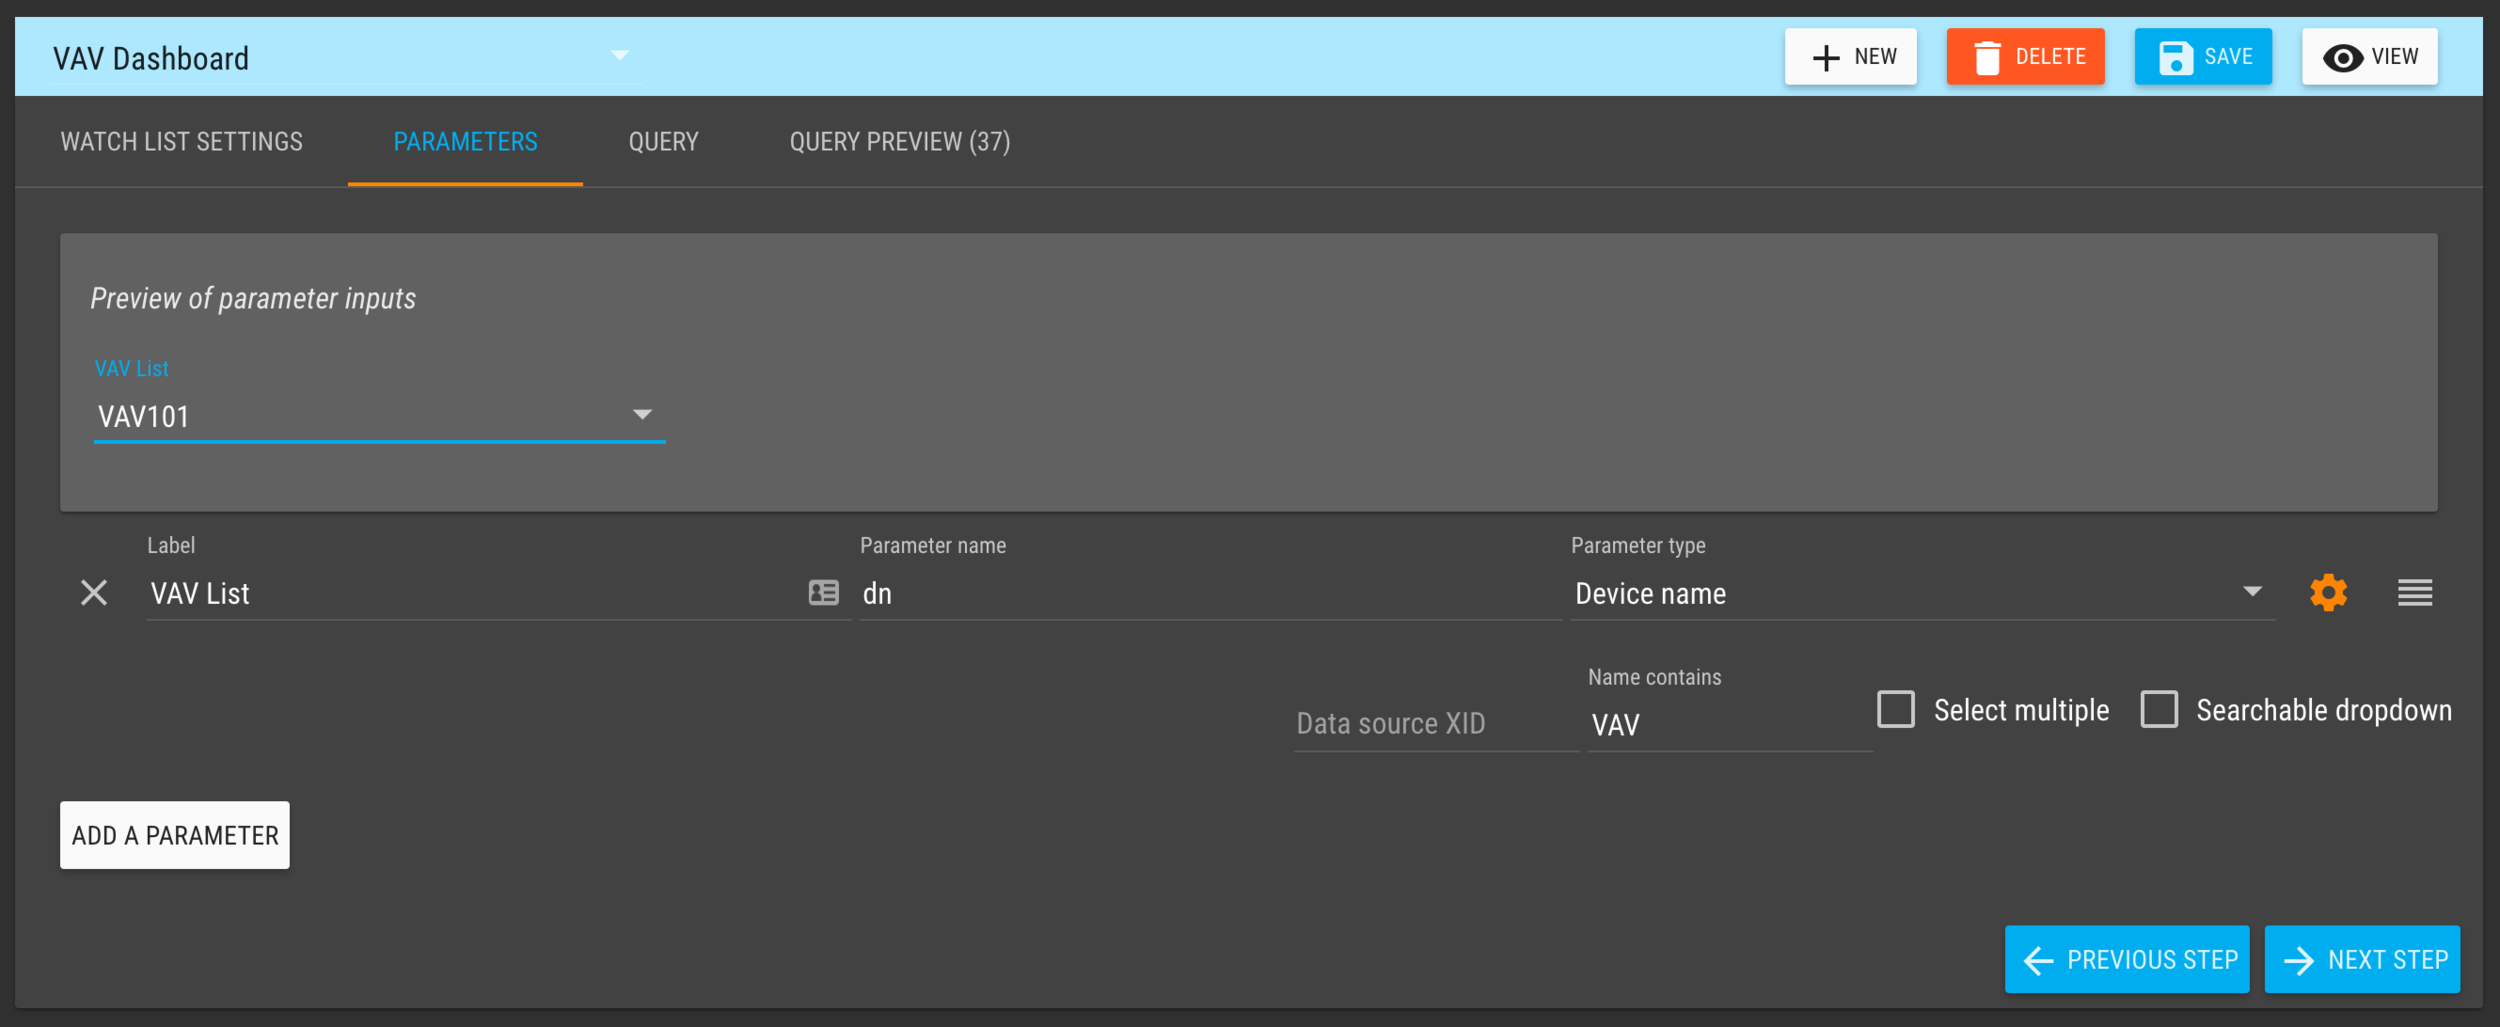
The Parameters tab is where you will add Parameters to build a dynamic query. Click the Add a Parameter button to add your first Parameter.

Each Parameter will have a Label, Parameter name, and Parameter type. The Label will be used with the parameter's input element on the Watch List's page. The Parameter name is a variable to be plugged into the RQL on the query tab. The Parameter type is the type of input to use.
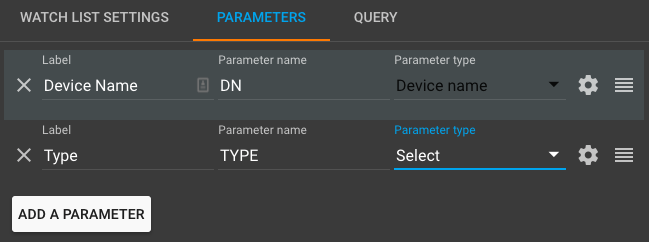
Different Parameter types will have different options which you can set by clicking the gear icon on the right side of the parameter's row. For example the Name contains option for the Device name type parameter could limit the dropdown to only device names containing the specified string. Such as the string 'Sample':

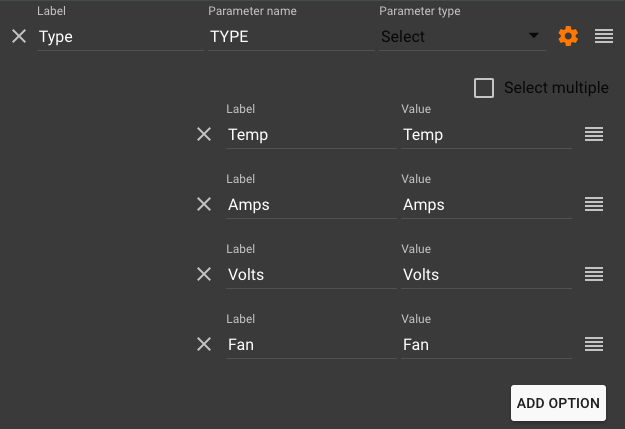
In this example we have a second Parameter with Parameter type of Select. Opening the configuration with the gear icon, you can set the different Options the user will pick from. You can also check the Select multiple box to make the dropdown select element a Multi-Select Dropdown that returns an array.
The Query tab is where you construct the RQL and plug in the Parameter names. Click the Add Expression button to add a new expression to the query. RQL will automatically be generated and usually you don't need to write RQL yourself. Each expression will need to have a Property to query on, a comparison Operation to use, and the Value to should be compare to. The Value can be a static value, or using Angular's double curly brace interpolation you can plug in your parameter Name. In this example the Query is on device names equal to our Device name parameter and data point names containing our Type parameter.

Lastly, you can set up to three Sort and one Limit properties for the RQL that will change how many Data Points are returned by the query, what Start index for those points is, and what order they are returned in. If a query matched 20 data points, but had a Limit of 10 and a Start of 10, then the second ten data points, points 11-20, would be returned.
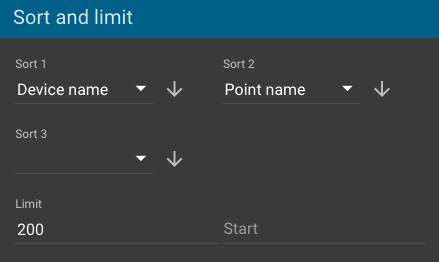
The end result is a dynamic Watch List that allows users to view groups of Data Points with device names and point name queries that update as the user changes the Parameter values while viewing the Watch List.

Point query Watch Lists enable system administrators to set up powerful dynamic Watch Lists that can be used to compare data in a comprehensible and logical manner — no matter how many Data Points exist in their system.
Advanced Query Example
In this example we have a group of list of devices like VAV101, VAV102, VAV201, VAV202 etc. Each VAV is associated with a RTU such that a VAV in the 100 range belongs to RTU1 and in the 200 range to RTU2 etc.
We can use a single Device Name parameter to get the list of VAV's and their points but we also need to include a single data point from the RTU that the VAV belongs to.
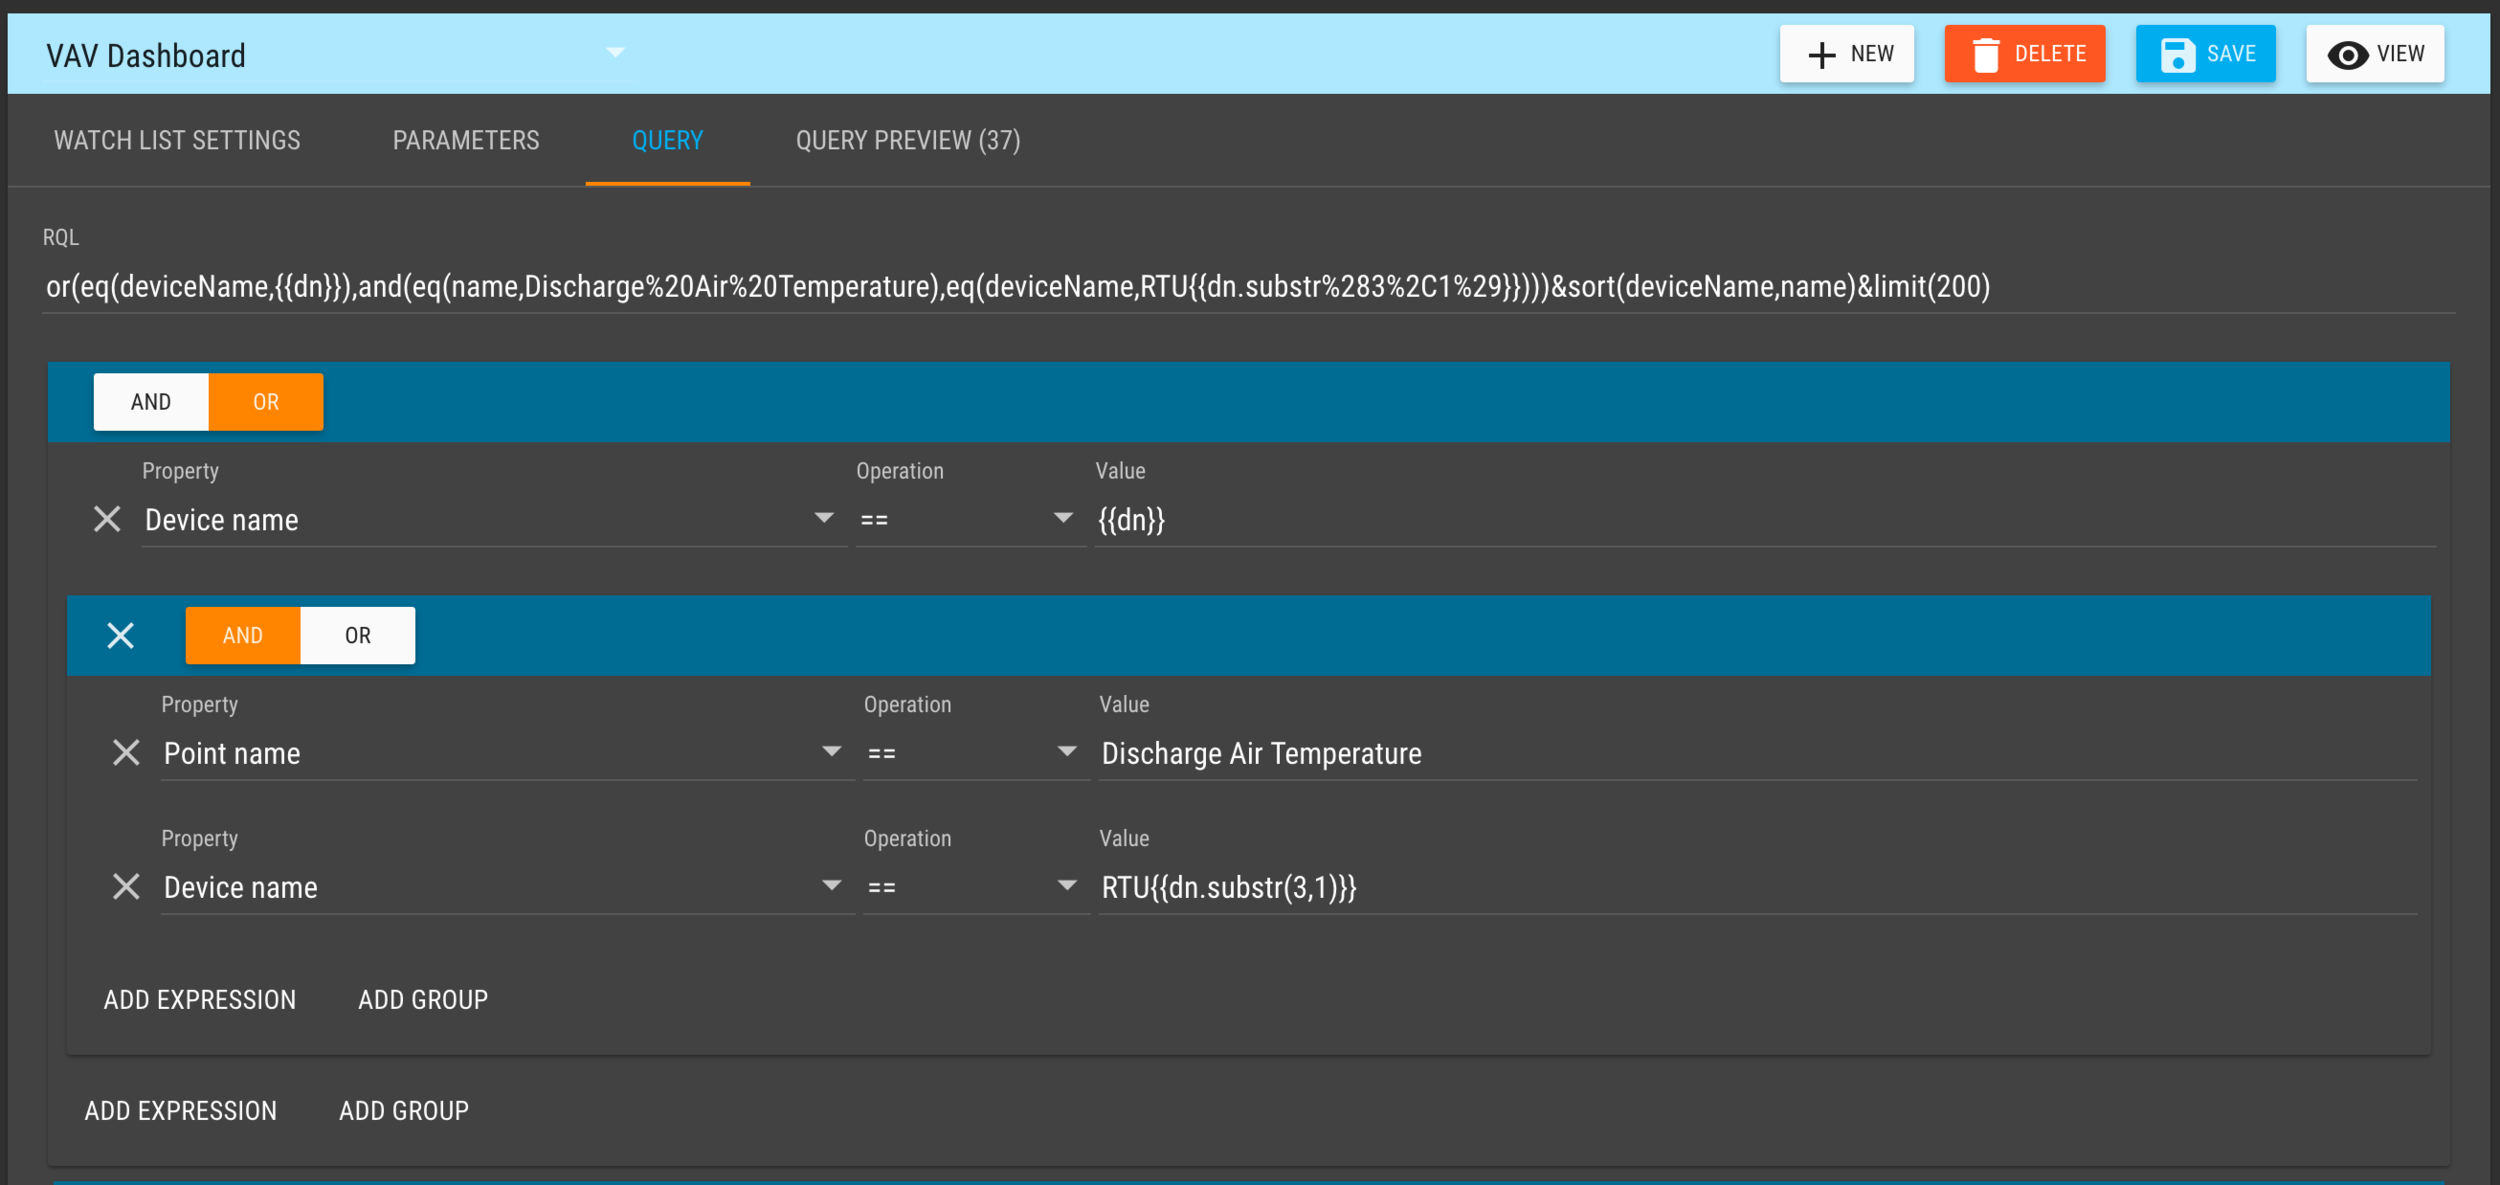
In the following screen shots you can see how we extract the correct RTU number based on the device name using dn.substr(3,1) where dn is our parameter variable.
Here is the Query screen where we are using two separate expression groups with the second group matching both the query parameters Point Name and Device Name. The Device Name query of RTU{{dn.substr(3,1)}} effectively ends up as RTU1 or RTU2 depending on the value Device Name selected.
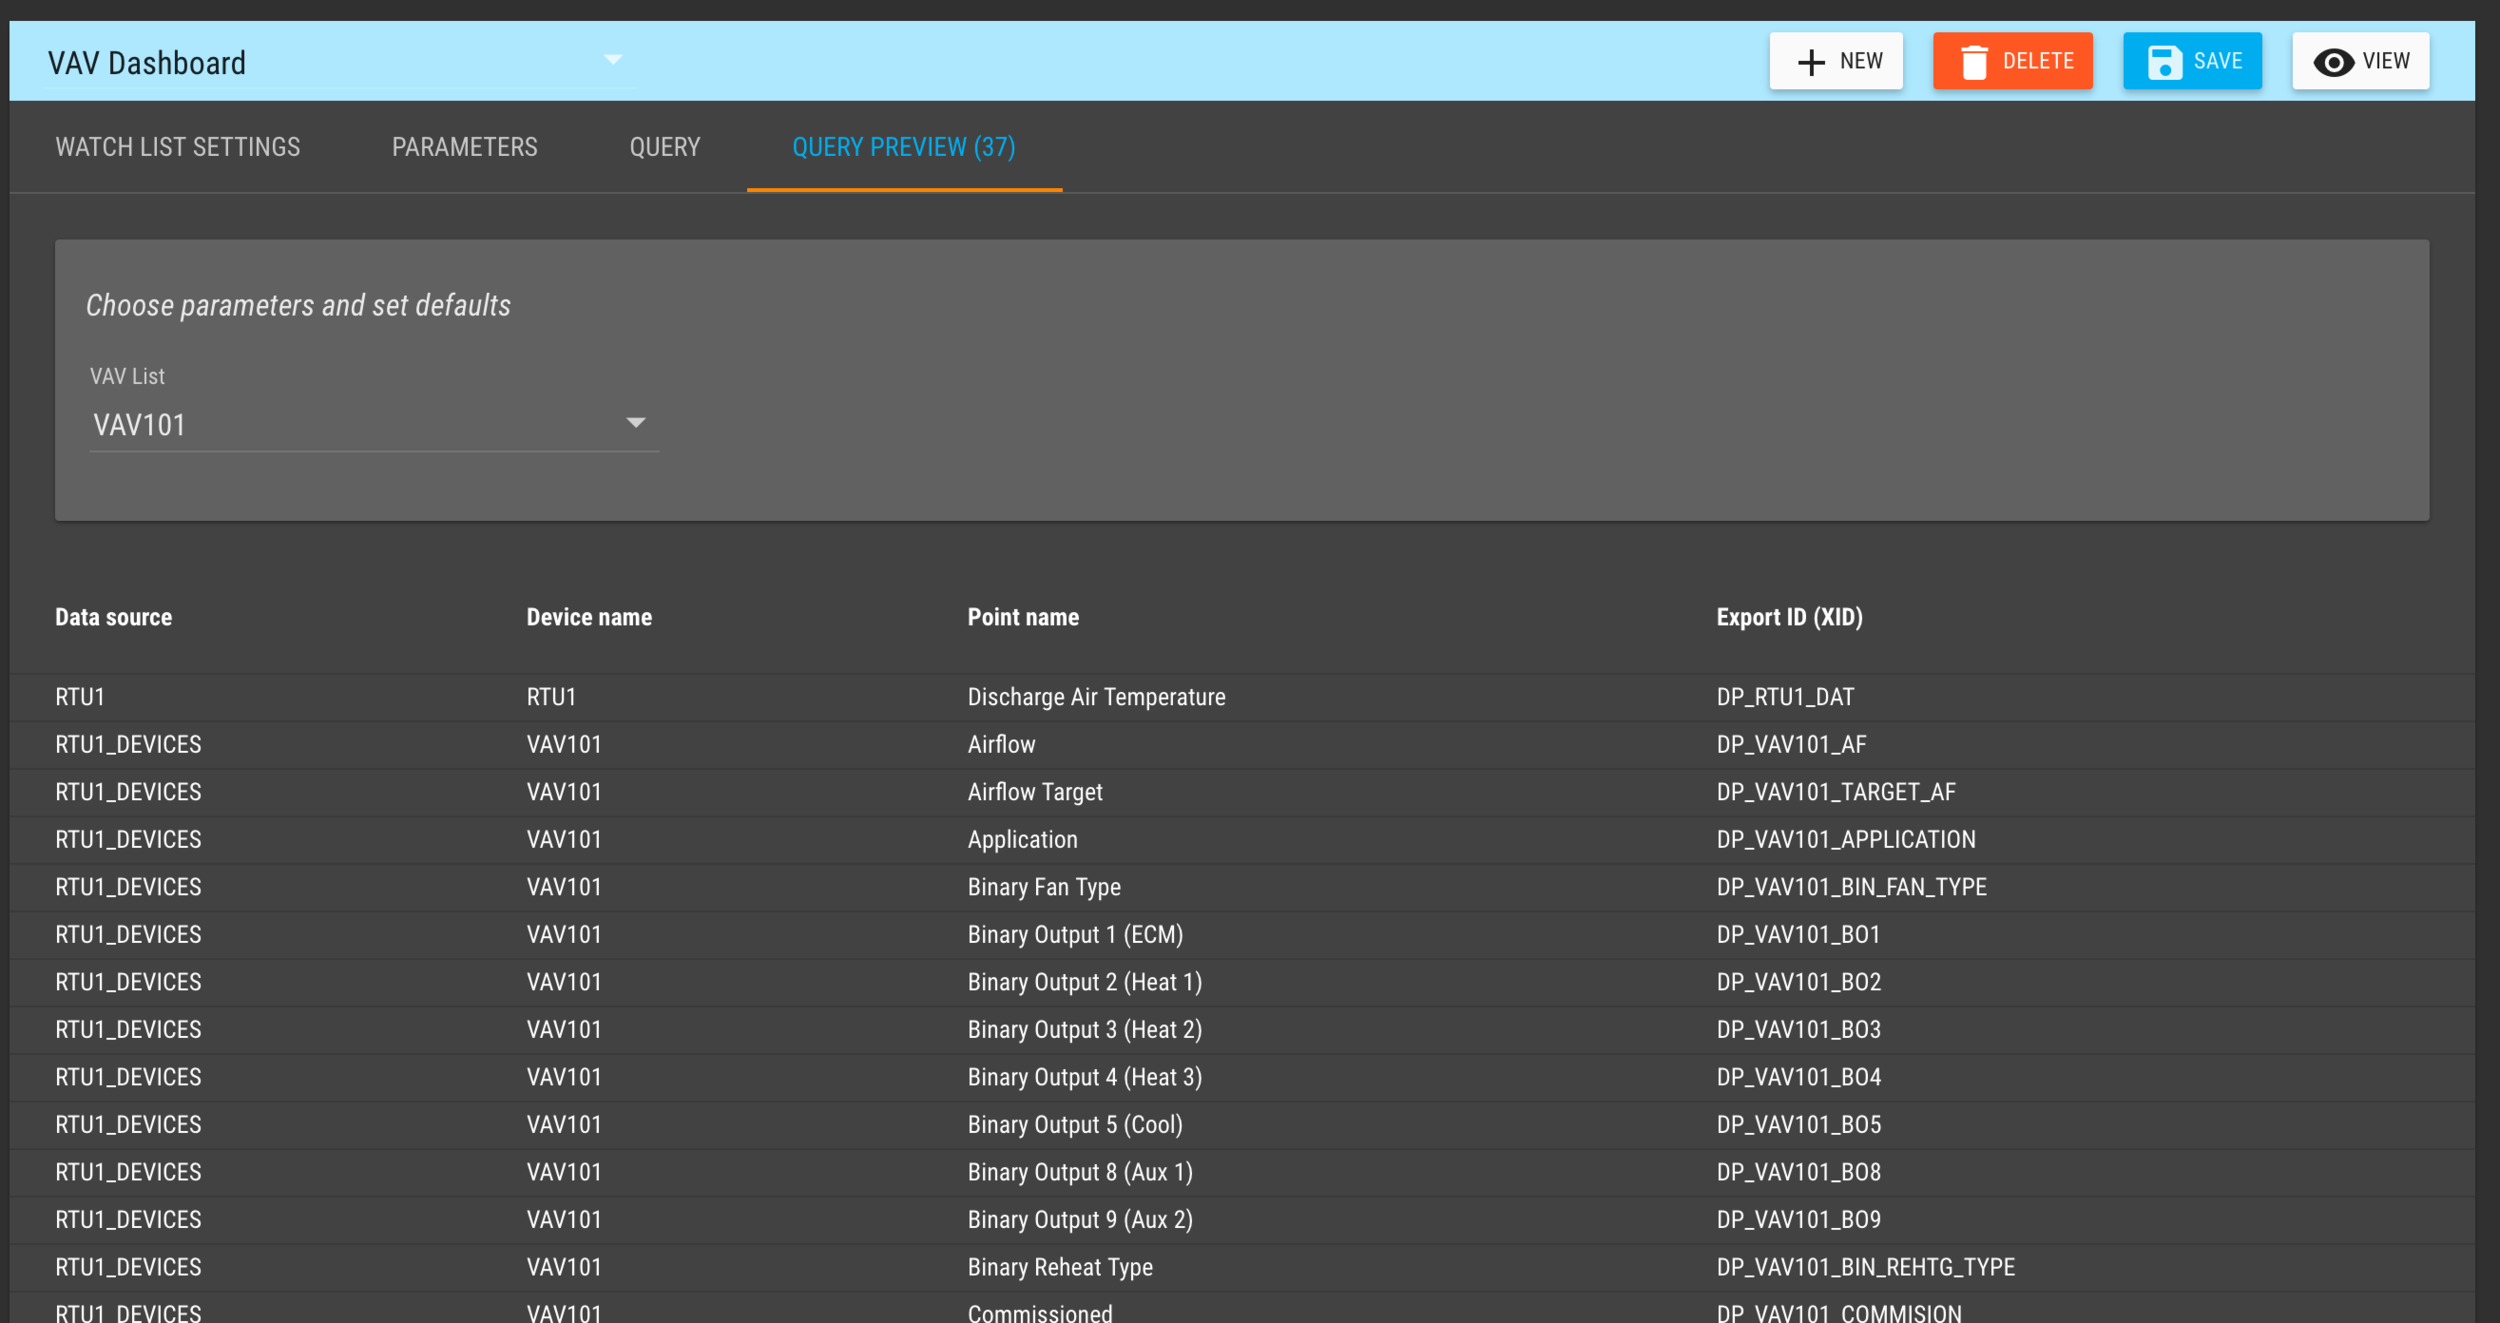
Here you can see the partial list of points:
