Introduction
This guide is intended as an IDE and operating system agnostic guide for developing frontend code for Mango Automation modules.
Technology brief
The main Mango user interface is supplied by the mangoUI module. It is a single page AngularJS (1.x) application which can be extended by other Mango modules e.g. they can supply new pages and routes or provide a component for editing a particular type of data source.
Mango modules use Webpack to compile/bundle all the web resources into a single Javascript file which is then loaded into the client browser.
The Mango UI interface relies heavily on the AngularJS Material framework and loosely adheres to the Material Design guidelines.
The UI can also be extended by supplying a user module (AngularJS module) and CSS file which are stored in Mango's internal file store. This approach is useful for small projects where developing a whole Mango module is overkill.
Tools required
You must install these tools in order to develop Mango modules.
- Git — latest version
- Node.js — 10.x.x LTS or higher
- yarn — 1.x (we use yarn lock files, note we do not currently support yarn v2)
- Java — 10.x LTS (to run Mango, please see the help site guide)
- Maven — latest version (optional, in order to build a complete zip file of a Mango module)
Code style and design guidelines
JavaScript
JavaScript should be written according to the ECMAScript 6 (ES6) standard.
We do not use a transpiler such as Babel to transpile code to ES5 for older browser support. Please ensure the features that you use are supported by all popular modern browsers. We support Chrome, Firefox, Safari (iOS and desktop), and Microsoft Edge. Microsoft IE is not supported.
You should follow the Airbnb ES6 style guide but use 4 spaces for indentation instead of tabs. You must use a linter in your IDE to check for errors and fix all warnings it reports. You should also configure it to enforce the style guide, for example the ESLint configuration files for the Airbnb style guide can be found here.
AngularJS
AngularJS components should be written in the AngularJS 1.5+ component syntax. Please do not use directives for this purpose.
Code that makes REST API requests to interact with the backend should be placed in a service. Do not make REST requests directly from a component.
Component and service names should be prefixed with ma in order to namespace them and prevent conflicts with other libraries.
Do
- Leverage the
$onInit(),$onChanges()and$onDestroy()hooks - Use ES6 classes for component controllers
- Use
&callback bindings for outputs - Require ngModel where appropriate and implement/use its
render()and$setViewValue()methods
Do not
- Use two-way/bidirectional
=bindings
Material Design
The Mango UI design loosely follows the Google Material Design guidelines. We rely heavily on the AngularJS Material library/framework to achieve this. You should leverage components and directives from this framework whenever appropriate. Please also see the section on colors below.
HTML
Markup should be HTML5 with AngularJS extensions.
Layouts
HTML layouts should use the AngularJS Material flex layout directives or component specific CSS classes which apply flex layout styles.
Responsive design
Layouts should be responsive and work on all screen sizes. Leverage the AngularJS Material flex layout directives to achieve this.
CSS
CSS class names should be prefixed with ma- in order to namespace our classes. Styles for a specific component should always be scoped to that component by placing the element tag name in front of all the rules. e.g. ma-my-component .ma-large-text { // rules }
Inline styles should not be used. Insead add a CSS file for each component and include it via a ES6 import statement in your component's Javascript e.g. import './myComponent.css';
The !important keyword should never be used. Instead use a higher priority specifier.
Colors
The Mango UI leverages the AngularJS Material framework to apply colors from a set of color palette which can be configured on the "UI Settings" page. Hardcoding colors in your CSS styles is therefore prohibited.
To apply a color to an element in your component you should use the md-colors directive from AngularJS Material. Always use a one time binding (see link above) when the color will not change.
If you want to customize the color palette so it matches a design you are making for a customer you can follow the instructions on our help site.
Localization and internationalization (translations)
You should not hardcode English text in your HTML, you should place all messages inside the module's classes/i18n.properties file and use the ma-tr directive to include the translated message in the markup.
Use moment.js to format dates. Use a format string that honors the user's configured locale settings. e.g. lll LTS There is also an AngularJS filter named maMoment which can be used to format dates in the markup, e.g. ng-bind="timestamp | maMoment:'format':'ll LTS'"
Cloning the Git repositories
Git configuration
Please add this to your global gitconfig
[branch]
	autosetuprebase = always
Clone repos
Clone the Mango repositories for the modules you will be working on into a single directory, we will refer to this directory as your development home directory.
Once you have cloned the repositories you must switch to the branch corresponding to the version of Mango you are developing on. For the nightly build of Mango the branch name is main, for Mango 3.7.x the branch name is 3.7.x
Installing Mango
Please read the installation documentation. Unless directed to use a released core version (such as Mango 3.7.x) you will need to download Mango from this URL in order to get the nightly build which is built from the main git branch.
Please ensure you copy the env.properties file into your overrides/properties directory as directed in the installation instructions linked above.
Configuring your env.properties
There are several features you should configure in order to make development easier.
Store URL
The store URL should be set as following when developing on top of the nightly build of Mango, this enables you to update your installed Mango core and modules from the nightly builds
store.url=https://teststore.mangoautomation.net
Development mode
Development mode should be enabled in order to load web resources from your module development directory instead of from the installed module. This enables you to change the source files in your development directory and see the changes immediately when you refresh your web browser.
development.enabled=true
development.home=your development home
development.moduleDirectories=your repos e.g. ma-dashboards
development.linkWeb=true
development.linkResources=true
development.linkClasses=true
development.loadMavenClasses=false
Configure the moduleDirectories setting with a comma separated list of any repos you are using inside your development home directory.
Sometimes you may want to only enable these settings for a particular module you are working on, you can put a comma separated list of module names in the following setting to achieve this
development.whitelistModules=mangoUI
Note for Windows
- You need to give your development user permission to create links https://stackoverflow.com/a/24353758/1650473
- You must escape the backslashes in your development.home path e.g. C:\Users\Jared\mango-main
Summary of effects of enabling development mode
- Java classes and properties files will be loaded from the module's development directory (maven-target/classes)
- A symlink will be created from the installed module directory web to your development directory web
- You can then run webpack in your development directory and see the changes reflected upon page reload.
- Any AngularJS module files from SNAPSHOT version modules will be loaded in the browser with a new ?v= parameter every time you refresh the page.This means you should not have to disable your cache and you will still load the latest copy of your files.
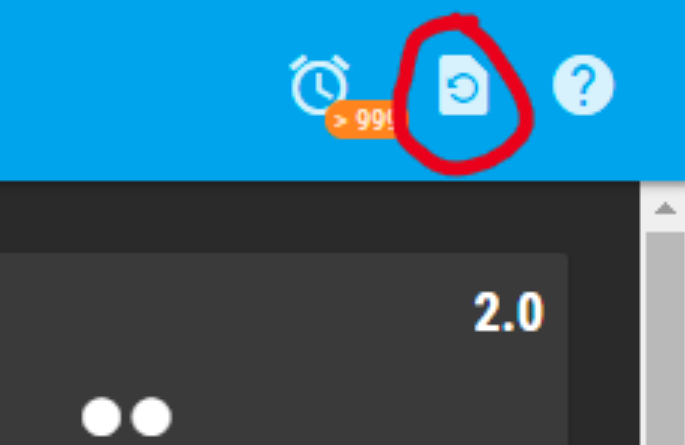
- Adds button to UI toolbar to clear translation cache (see above).
Miscellaneous settings
You may also want to prevent Mango from opening a new browser window every time you start it
web.openBrowserOnStartup=false
You can enable the Swagger/OpenAPI 2.0 and the Swagger UI using the following setting, the UI can then be accessed at http://localhost:8080/swagger-ui.html
swagger.enabled=true
Starting Mango
Use the $MA_HOME/bin/start-mango.sh script to start Mango. Please see this article for more details.
You should now be able to access Mango at http://localhost:8080/ (provided you have not changed the default port or HTTPS settings).
Compiling frontend code
Once you have completed the steps above and you have Mango running, ensure that the module you will be working on is installed in Mango. Development mode only works for modules that are actually installed in Mango.
Inside your module development directory run this command to install the Node.js dependencies
yarn install --frozen-lockfile
Now whenever you wish to compile your frontend code you can run the following command to compile/bundle the source files from the module's web-src directory into the web directory
yarn webpack --mode development
Alternatively you can run webpack in watch mode so it automatically compiles the code whenever a source file changes
yarn webpack --mode development --watch
Now whenever you refresh your web browser you will see your updated changes.
Development mode also enables a button at the top right of your Mango UI toolbar, this button causes Mango to clear its cached translations and refresh the page, this will enable you to see your updated translations from your 18n.properties file.
Debugging
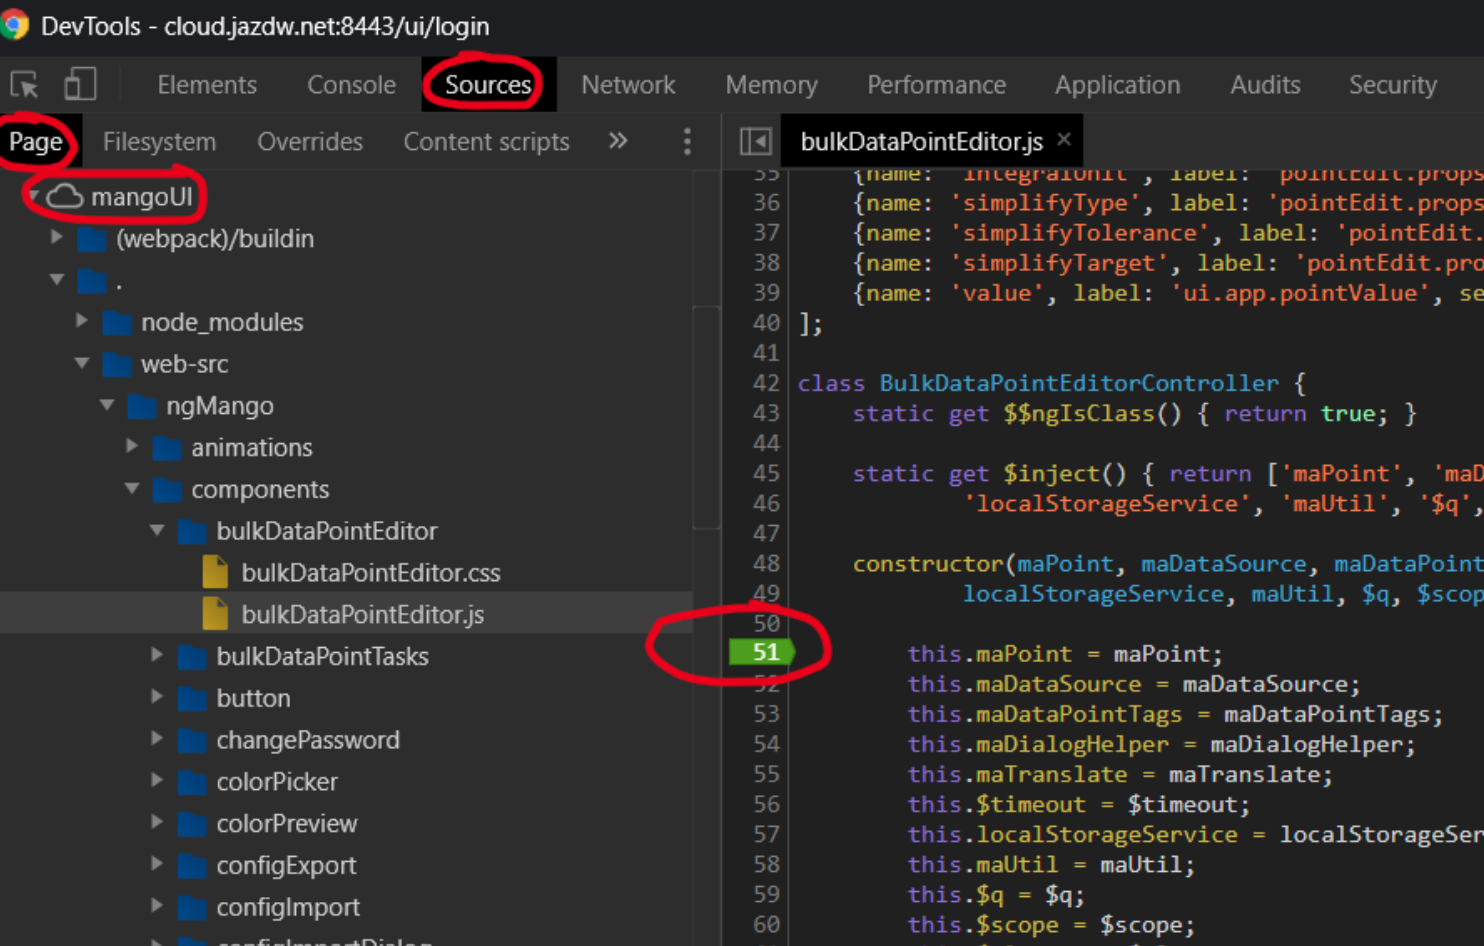
If you compile your module's frontend code using the webpack development mode as directed above you will be able to debug your Javascript code much easier in your browser's development tools. We highly recommend using Chrome DevTools for this purpose. See the screenshot below for an example of setting a breakpoint in Chrome DevTools.
If you run webpack in production mode the Javascript code is minified and you will not be able to easily debug it. When modules are built using Maven for packaging and deployment to the store they will be built in production mode.
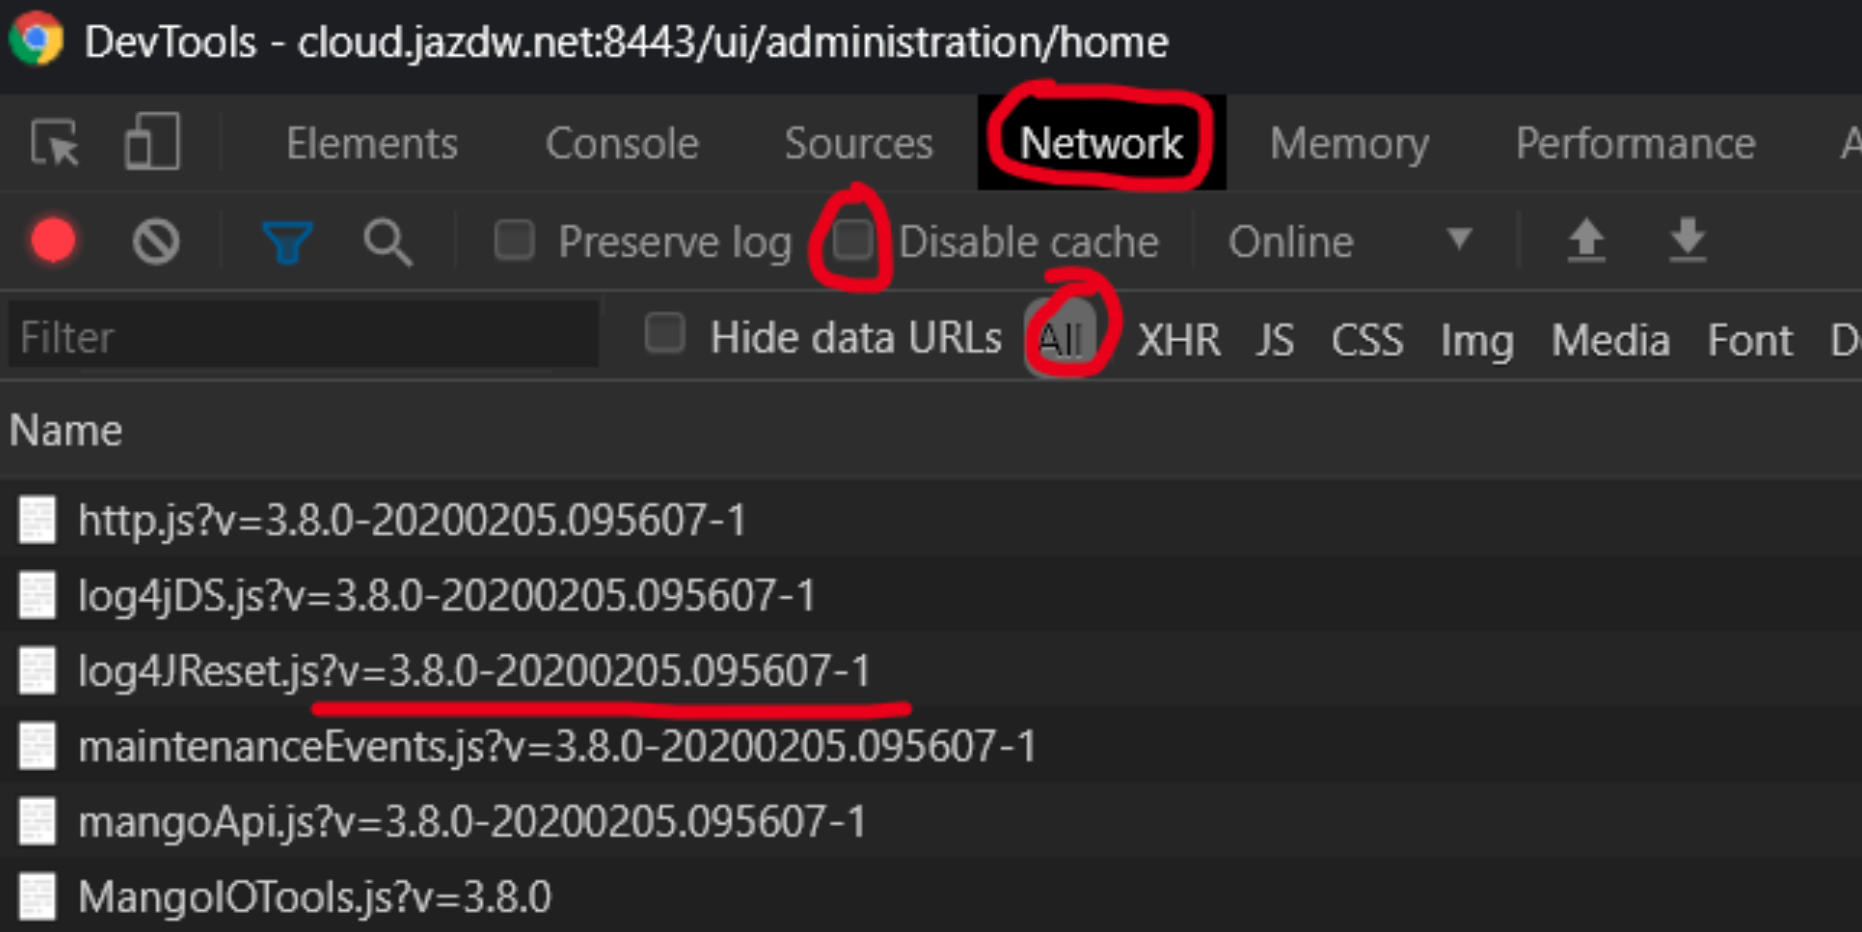
Browser caching
When Mango has development mode enabled all module resource files will be loaded by the browser with a ?v= query parameter that changes every time you refresh your browser. This means that you should not have to clear or disable your cache.
There is however one caveat, the Mango UI application installs a service worker which does cache module assets. You should bypass the service worker for network requests in your development tools —
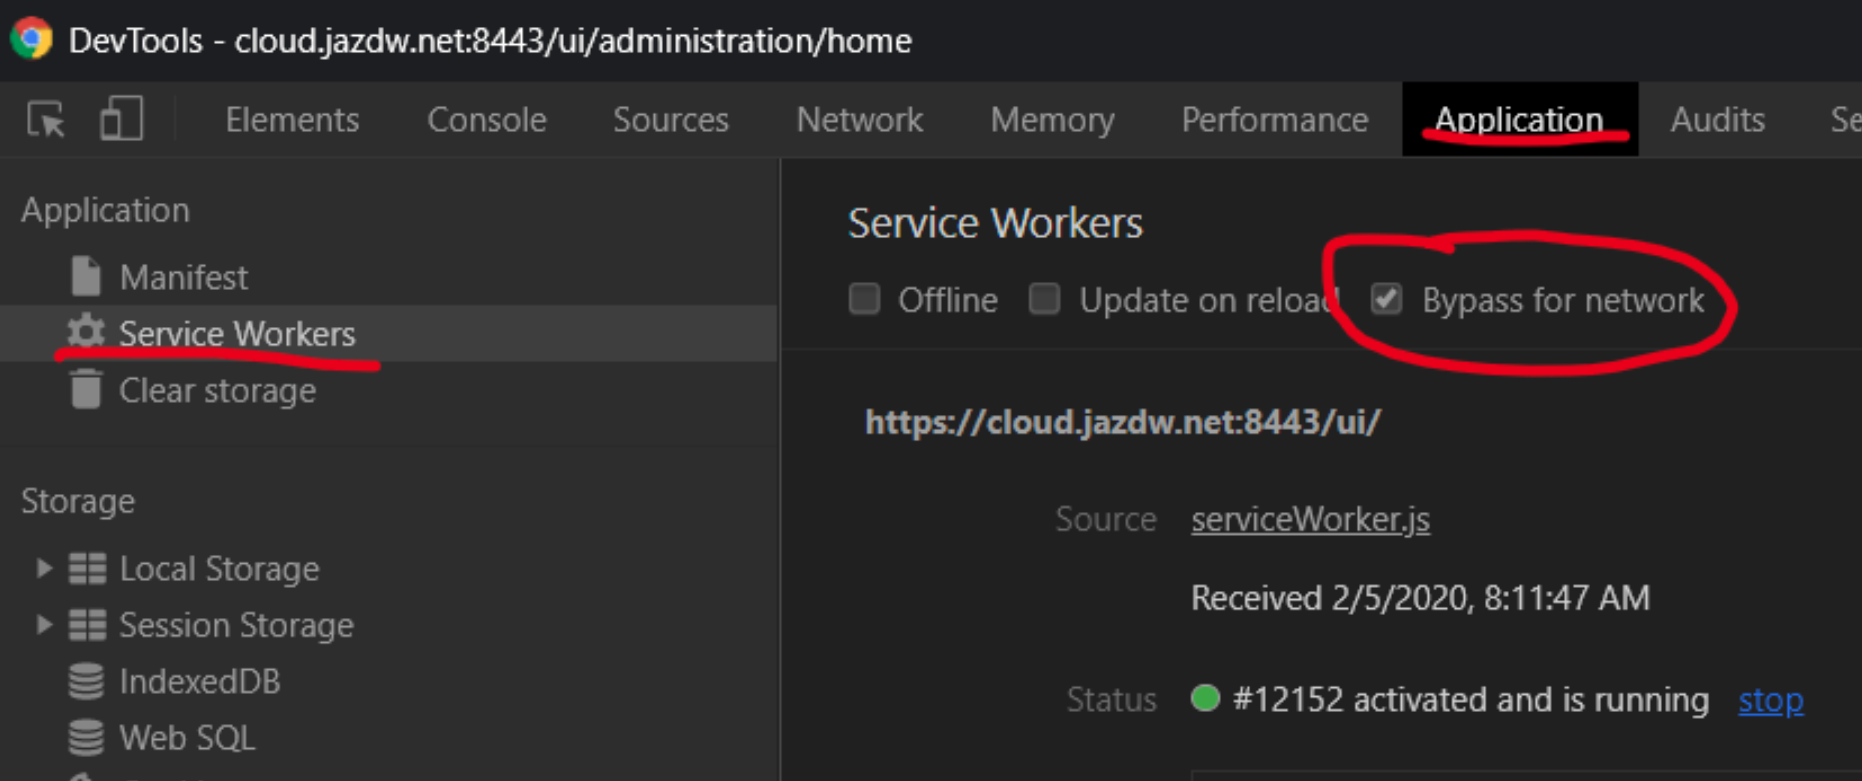
Note: you must have the dev tools open at all times for this setting to take effect.
Module directory structure
The following is a summary of the general directory layout/structure of a Mango module. It may vary slightly from module to module.
**entries are paths that should not be committed to the git repository.
| Path | Description |
|---|---|
| src | Java source code |
| src-test | Java test source code |
| resources | Java resources to be included in the built .jar file |
| file-resources | General resource files that are installed into the module directory |
| api-test | Node.js/Mocha tests for the REST API |
| classes | Contains files to be added to the Java classpath |
| classes/i18n.properties | Root translations file, effectively en_US translations |
| ** maven-target | Output directory used by Maven when building the module |
| web-src | Files for Webpack compilation/bundling, including JS, CSS, HTML, images, etc |
| web | Files to be served up from the web server once the module is installed |
| ** web/angular | Output directory for Webpack compilation/bundling |
| licenceTypes.xml | Module licensing information |
| module.properties | Information about the module that is loaded by Mango |
| pom.xml | Maven build configuration file, lists Java dependencies |
| RELEASE-NOTES | Release notes that are displayed by the store |
| webpack.config.js | Webpack configuration file |
| yarn.lock | Yarn lock file that holds locked dependency versions for NPM packages |
| package.json | NPM package information, lists Javascript package dependencies |
| ** node_modules | Installed NPM dependencies |
| ** node | Contains a Node.js binary and yarn binary that are used during a Maven build |
Creating a new module
Note: These instructions are experimental, we should improve the mango-module-tools to give it the ability to initialize a full skeleton Mango module.
- Copy this default pom.xml into your new module directory
- Edit the pom.xml, enter your module name, artifact id and description
- Copy this default package.json file into your new module directory
- Run
yarn install - Run
yarn run update-package-json - Create a web-src directory with a root .js file named the same as your module
- Create a webpack.config.js file
- Run
mvn install
Forms and error feedback
Git feature branches and pull requests
List of developer documentation
- Swagger
- API docs
- Examples
- Forum
- Help site
Building a complete module zip file
If you installed Maven you will be able to build a complete module zip file for installation into Mango by running mvn install or mvn install -Dwebpack.mode=development (to compile the front end code using webpack development mode when building the zip)
The first time you run this command it will take a long time to download all the Maven plugins and dependency jar files. You can then copy the built module zip file from maven-target into $MA_HOME/web/modules in order to install it (restart Mango).