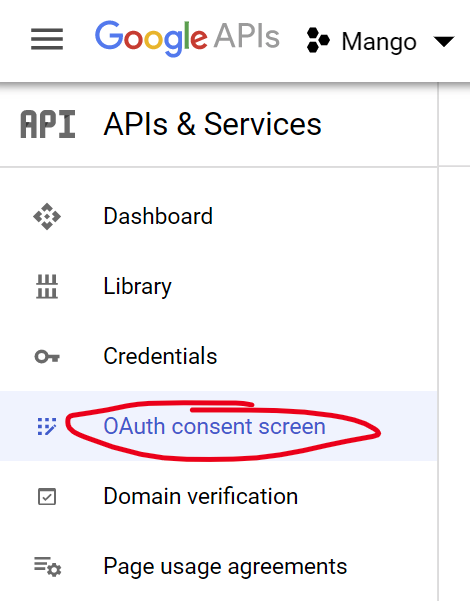
- Open the Google APIs console here.
- Create an OAuth consent screen.
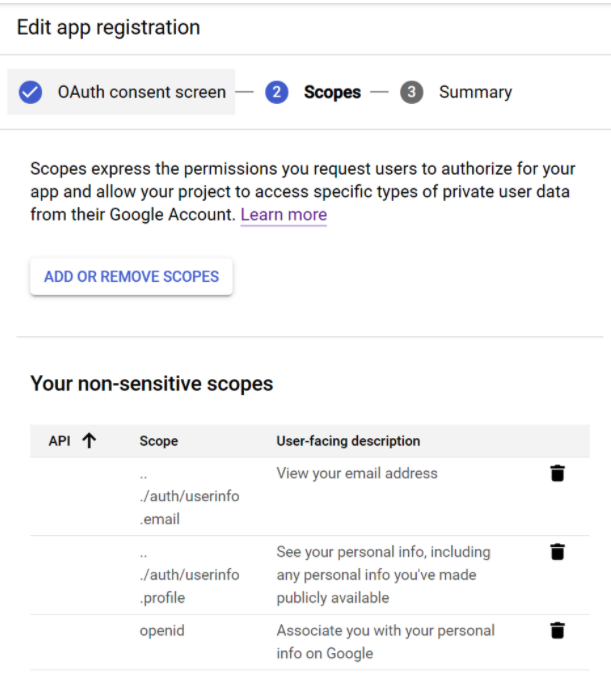
- On the Scopes page add “openid”, “email”, and “profile”.
- Go to the credentials page and create an OAuth client ID.
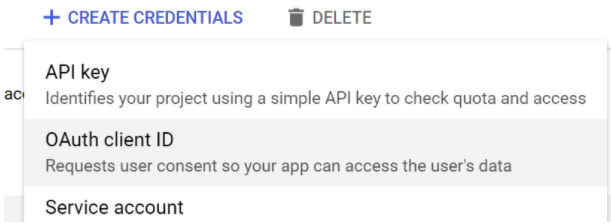
- Choose “Web Application”.
- Enter your Mango URL in “Authorized JavaScript Origins” e.g. “https://demo.mangoautomation.net”.
- In “Authorized redirect URIs” enter your Mango URL followed by “/oauth2/callback/{Your Organization}” e.g. “https://demo.mangoautomation.net/oauth2/callback/{Your Organization}”.
- Copy your “Client ID” and “Client secret” into your
mango.propertiesfile. - Minimum configuration is:
authentication.oauth2.enabled=true
oauth2.client.registrationIds={Your Organization}
oauth2.client.registration.{Your Organization}.clientId={client id}
oauth2.client.registration.{Your Organization}.clientSecret={client secret}
- You may wish to add a custom authorization URI with additional parameters e.g.
oauth2.client.registration.google.authorizationUri=https://accounts.google.com/o/oauth2/v2/auth?hd={your gsuite domain}
- You may also wish to add your app to the allowlist so users do not have to individually consent to sharing their profile.
Microsoft / Office 365 / Azure Active Directory
- Open the Microsoft Azure portal.
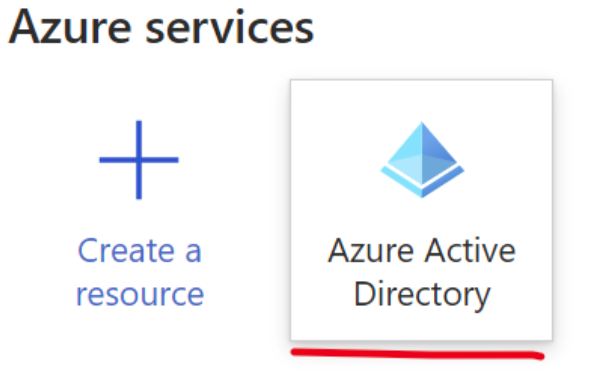
- Navigate to “Azure Active Directory” from the menu at the top left, or the icon on the home page.
- Choose “App registrations” from the left menu.

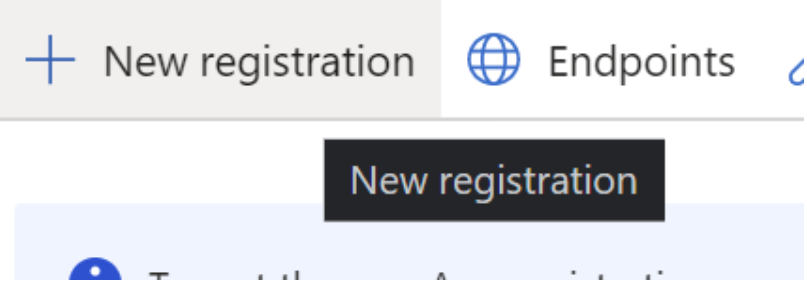
- Click “New registration”.
- Enter a name e.g. “Mango” and select your supported account type (you probably want to restrict logins from your own directory only / single tenant).
- Under “Redirect URI” select “Web” and enter your Mango URL followed by “/oauth2/callback/{Your Organization}” e.g. “https://demo.mangoautomation.net/oauth2/callback/{Your Organization}”
- Click “Register”.
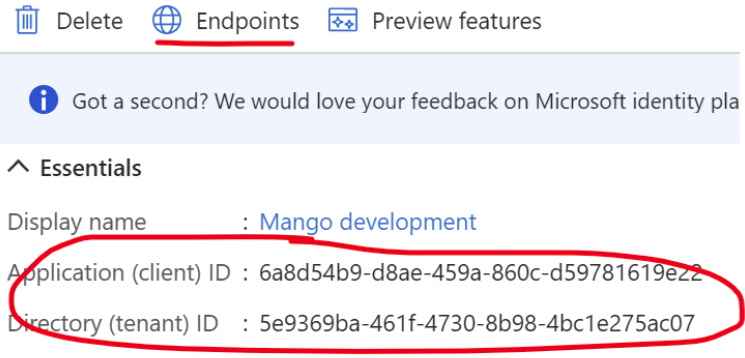
- You will need some pieces of information from the application home screen, clicking endpoints will show you the URIs you need to enter in your env.properties file.
- You will also need a client secret, click “Certificates & secrets” on the left menu and choose “New client secret”.
- Give your secret a description e.g. “Mango instance xyz” and click “Add”.
- Copy the client secret “Value” into your
mango.properties. - The minimum configuration for your env.properties file is:
authentication.oauth2.enabled=true
oauth2.client.registrationIds={Your Organization}
oauth2.client.registration.{Your Organization}.authorizationUri=https://login.microsoftonline.com/{Tenant ID}/oauth2/v2.0/authorize
oauth2.client.registration.{Your Organization}.tokenUri=https://login.microsoftonline.com/{Tenant ID}/oauth2/v2.0/token
oauth2.client.registration.{Your Organization}.jwkSetUri=https://login.microsoftonline.com/{Tenant ID}/discovery/v2.0/keys
oauth2.client.registration.{Your Organization}.issuerUri=https://login.microsoftonline.com/{Tenant ID}/v2.0
oauth2.client.registration.{Your Organization}.clientId={Application ID}
oauth2.client.registration.{Your Organization}.clientSecret={Client secret value}
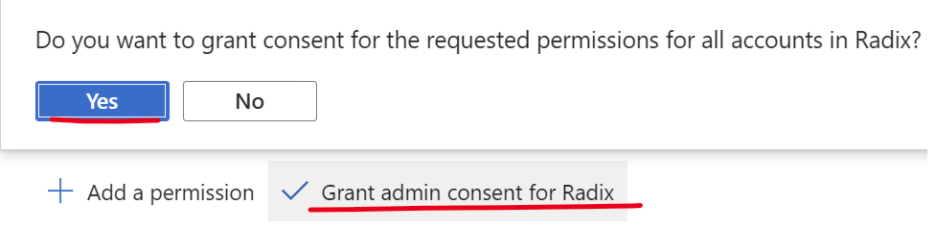
Pre-grant consent
You can give admin consent for privileges (sign in and read user profile) on the “API permissions” page.
Assigning Mango roles to users
- You may wish to map groups/users from your Microsoft account into Mango. Note that there are several approaches to this with Microsoft, this is only one way of assigning roles.
- Another approach is to add a “groups” claim via “Token configuration” then map Mango roles to the groups claim via your
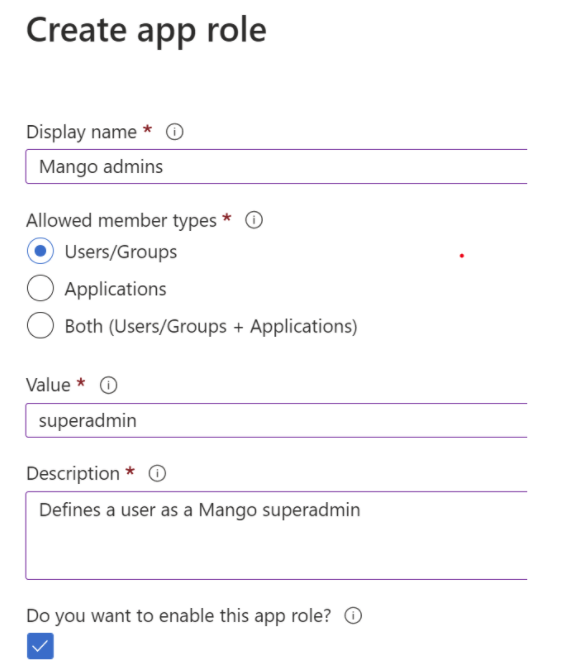
env.properties. - Click “App roles” on the left menu and then “Create app role”.
- To create an app role that corresponds to the mango superadmin role for example:
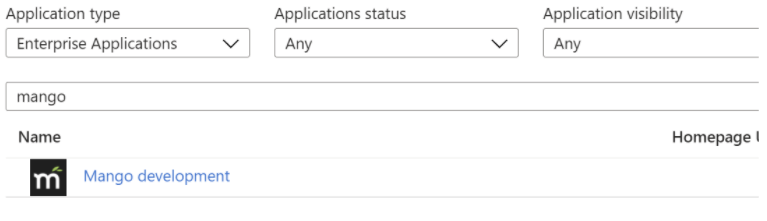
- Once you have created the role, you can assign users from “Enterprise Applications” on the portal home page.
- Find your application.
- Assign users/groups to the role you created under “Users and groups” on the left menu. Note that you can only assign “Users & Security groups”, not “Microsoft 365” groups.