This is the 1st article of a Dashboard development series. You can check all the articles by clicking here
To configure Mango for UI development, follow the next steps:
-
Download the latest version of Mango available. For this tutorial series, I'm using Mango 3.8.X version.
-
Unzip an move the directory to the prefered location. For more information about installation, check here
-
Go to
MA_ROOT/web/modulesand leave only the modules that you want to use. In our case we are going to leave the next modules:- Dashboard designer
- Internal data source
- Mango API
- Mango UI
- Meta data source
- Scripting data source
- Virtual data source
- Watchlists
-
Copy the
MA_ROOT/classes/env.propertyfile intoMA_ROOT/overrides/propertiesdirectory. -
Open the terminal, go to the Mango root directory, and run the next commands:
cd bin
./start-mango.sh
this will open a window in the default browser and Mango will be initalized.
-
Enter the default credentials
- username: admin
- password: admin
-
Go to Edit menu, under Administration, and enable API docs and, under Administration route, enable JSON store. Remember to click save after making the changes.
And that's it, you have installed Mango to work on the UI development.
For more information about the best practices in UI development, check here
Define a custom theme
In Mango, you can set different pre-defined themes in Administration > UI settings. But, in this case, we are going to define our own custom theme. This can be done in the JSON store by editing the mangoUI-settings item. By default, you will see something like this:
{
    "defaultTheme": "mangoLight2020",
    "alternateTheme": "mangoDark2020",
    "pwaManifest": {
        "theme_color": "rgba(7, 54, 80, 1)",
        "background_color": "rgba(250, 250, 250, 1)"
    }
}
Note: If you can't find the JSON store menu item, go to Edit menu, under Administration, and under Administration route, enable JSON store. Remember to click save after making the changes.
We add a primary and a accent palette (for more information about material design guidelines, check here):
{
    ...
    "palettes": {
        "primary": {
            "50": "#E8F0F5",
            "100": "#E8F0F4",
            "200": "#A5C3D3",
            "300": "#6197B2",
            "400": "#34799C",
            "500": "#085C87",
            "600": "#074C6F",
            "700": "#063B56",
            "800": "#05334A",
            "900": "#032232",
            "A100": "#E8F0F4",
            "A200": "#A5C3D3",
            "A400": "#34799C",
            "A700": "#063B56",
            "contrastDefaultColor": "light",
            "contrastDarkColors": "50 100 200 A100 A200"
        },
        "accent": {
            "50": "#E8F0F5",
            "100": "#FCF1ED",
            "200": "#F8D6CA",
            "300": "#F1AD96",
            "400": "#F28864",
            "500": "#F26F42",
            "600": "#BD5634",
            "700": "#934329",
            "800": "#69301D",
            "900": "#2A140C",
            "A100": "#FCF1ED",
            "A200": "#F28864",
            "A400": "#F26F42",
            "A700": "#BD5634",
            "contrastDefaultColor": "light",
            "contrastDarkColors": "50 100 200 A100 A200"
        }
    },
    ...
}
Next, we add a new custom theme that use these palettes:
{
    ...
    "themes": {
        "light": {
            "primaryPalette": "primary",
            "primaryPaletteHues": {
                "default": "500",
                "hue-1": "300",
                "hue-2": "800",
                "hue-3": "100"
            },
            "accentPalette": "accent",
            "accentPaletteHues": {
                "default": "A400",
                "hue-1": "500",
                "hue-2": "A200",
                "hue-3": "A700"
            },
            "dark": false
        }
    },
    ...
}
Be sure to have a valid json, and click save.
Now, go to UI settings, uncheck Use browser preferred color scheme, select the "light" theme, and click save.

Define a custom font
To define a custom font, we need to create a custom css file. But first, let's create a the project folder in the File stores. Go to Administration > File stores, by default you will see the content of the default folder. Click on File stores to move to the root directory:

Then, go to public directory, create a hvacDashboards directory, and inside of this directory, create a hvac.css file. In this file, we will add the next code:
@import url('https://fonts.googleapis.com/css2?family=Montserrat:ital,wght@0,100;0,200;0,300;0,400;0,500;0,600;0,700;0,800;0,900;1,100;1,200;1,300;1,400;1,500&display=swap');
In the UI settings, Miscellaneous settings section, add this css file:

Now, Go to the JSON store and add the next fonts object to mangoUI-settings item:
{
	...
	"fonts": {
        "default": "Montserrat",
        "heading": "Montserrat",
        "paragraph": "Montserrat"
    },
    ...
}
Once you click save you will see that the font has changed to Montserrat
Here is the final json
{
    "defaultTheme": "light",
    "usePreferredColorScheme": false,
    "alternateTheme": "mangoDark2020",
    "palettes": {
        "primary": {
            "50": "#E8F0F5",
            "100": "#E8F0F4",
            "200": "#A5C3D3",
            "300": "#6197B2",
            "400": "#34799C",
            "500": "#085C87",
            "600": "#074C6F",
            "700": "#063B56",
            "800": "#05334A",
            "900": "#032232",
            "A100": "#E8F0F4",
            "A200": "#A5C3D3",
            "A400": "#34799C",
            "A700": "#063B56",
            "contrastDefaultColor": "light",
            "contrastDarkColors": "50 100 200 A100 A200"
        },
        "accent": {
            "50": "#E8F0F5",
            "100": "#FCF1ED",
            "200": "#F8D6CA",
            "300": "#F1AD96",
            "400": "#F28864",
            "500": "#F26F42",
            "600": "#BD5634",
            "700": "#934329",
            "800": "#69301D",
            "900": "#2A140C",
            "A100": "#FCF1ED",
            "A200": "#F28864",
            "A400": "#F26F42",
            "A700": "#BD5634",
            "contrastDefaultColor": "light",
            "contrastDarkColors": "50 100 200 A100 A200"
        }
    },
    "themes": {
        "light": {
            "primaryPalette": "primary",
            "primaryPaletteHues": {
                "default": "500",
                "hue-1": "300",
                "hue-2": "800",
                "hue-3": "100"
            },
            "accentPalette": "accent",
            "accentPaletteHues": {
                "default": "A400",
                "hue-1": "500",
                "hue-2": "A200",
                "hue-3": "A700"
            },
            "dark": false
        }
    },
    "fonts": {
        "default": "Montserrat",
        "heading": "Montserrat",
        "paragraph": "Montserrat"
    },
    "userCss": "/rest/v2/file-stores/public/hvacDashboards/hvac.css",
    "pwaManifest": {
        "theme_color": "rgba(5, 51, 74, 1)",
        "background_color": "rgba(250, 250, 250, 1)"
    }
}
Create data points for testing
We are going to create some virtual data, which is really helpful while we are developing the UI. There are several units, and each unit have the next data points:
- Status: Online/Offline
- Power: in kW, between 0kW and 200kW
- kW/ton: between 0.1 and 0.9
- Occupacy: Occupied/Empty
Other data that will be stored in the JSON store:
- Name
- lat
- lon
Let's start by creating the virtual data source:
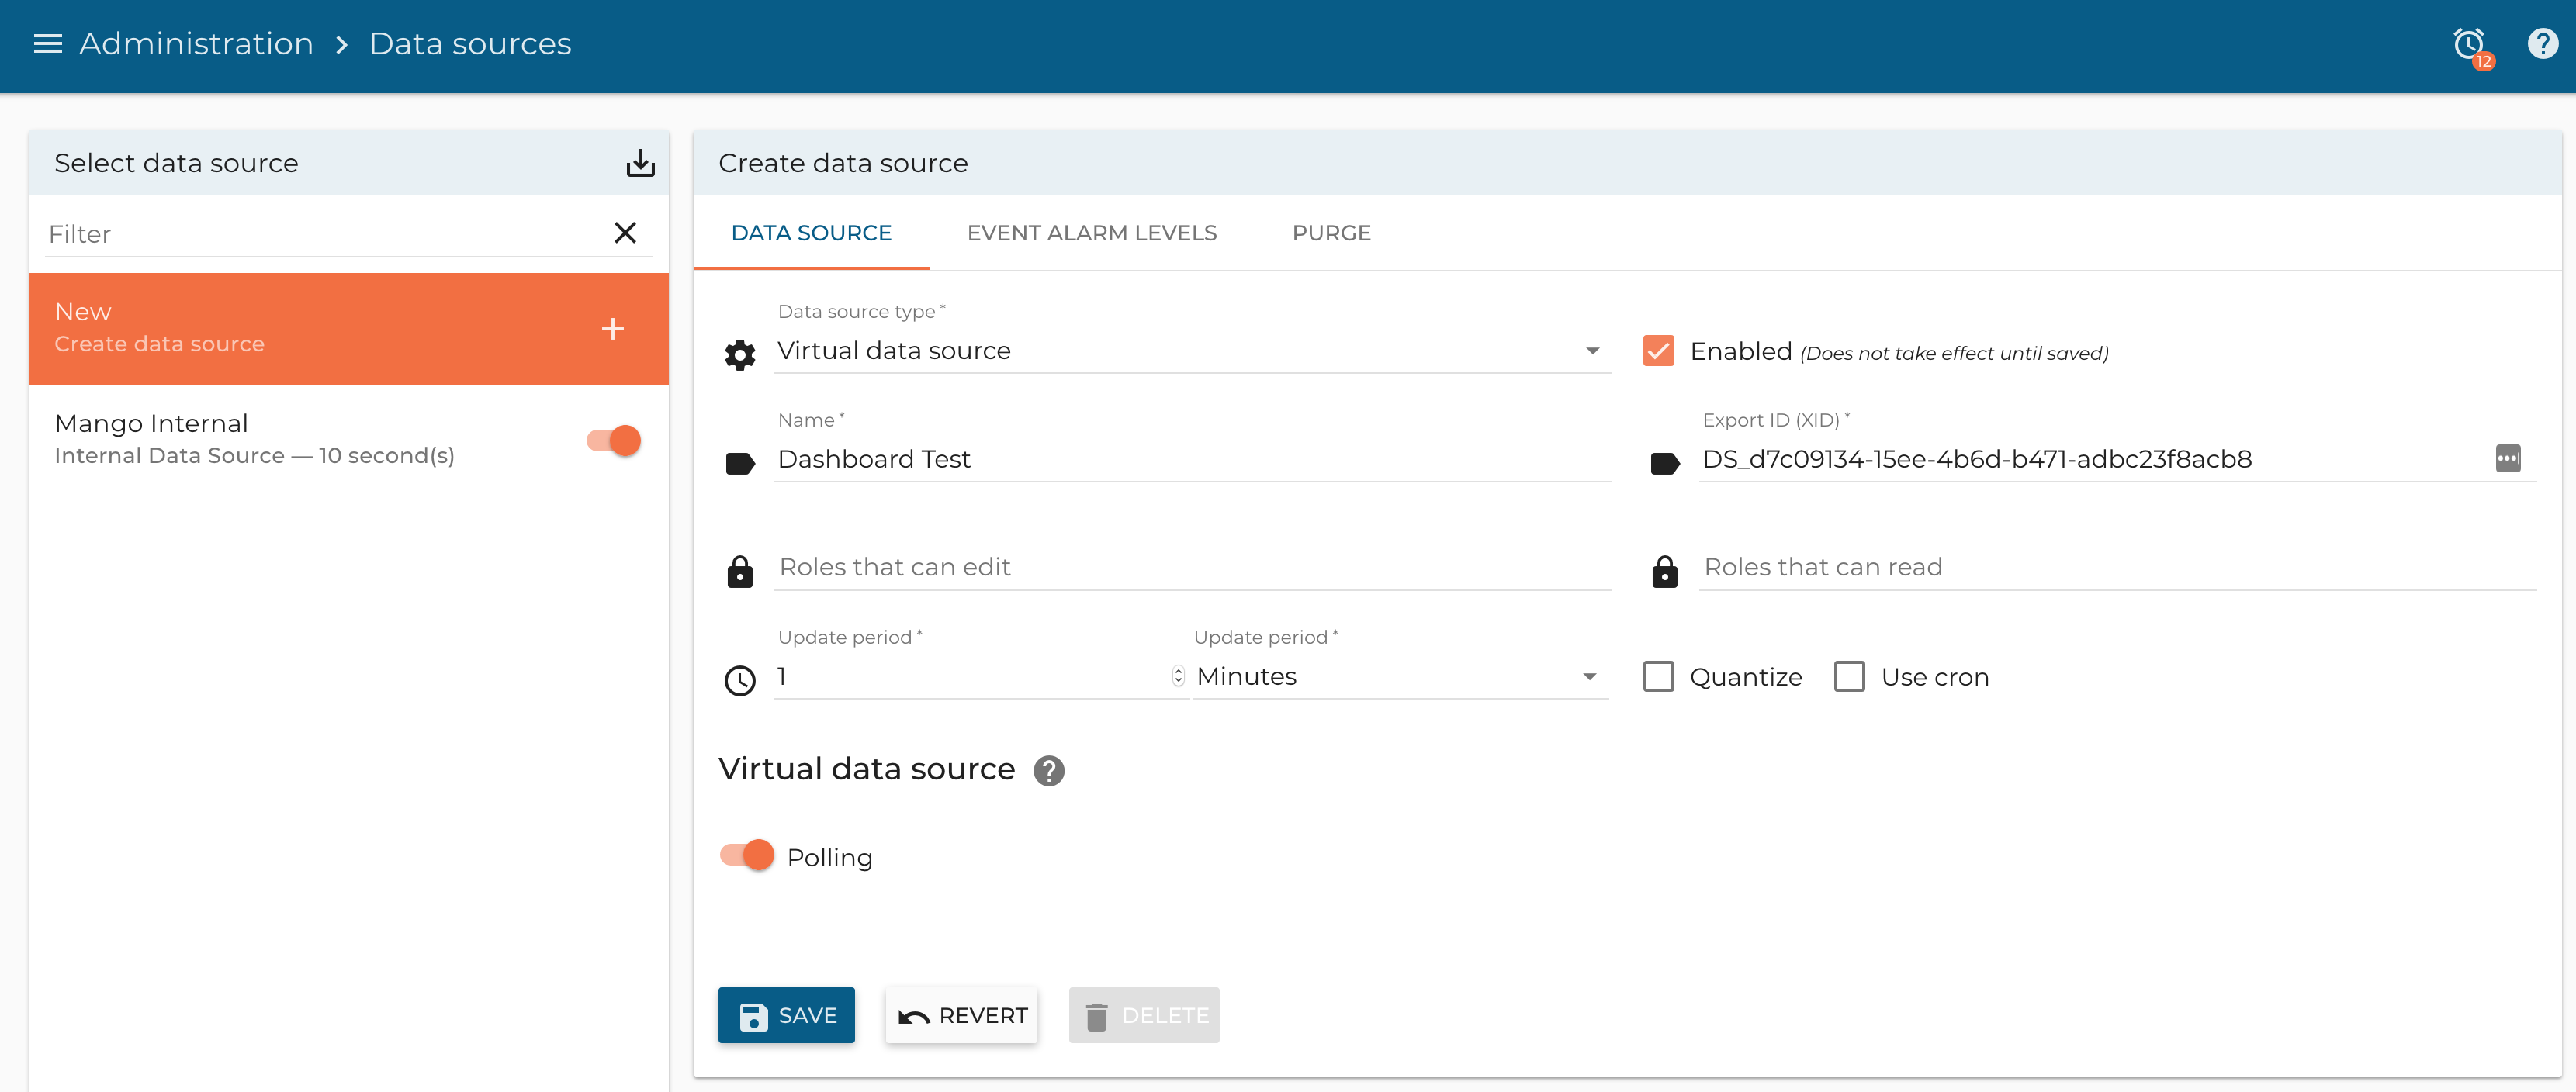
Once you click Save, go to the data points tab and click on + Add. Let's create our first data Status data point. This is a Binary data that has the next 2 states:
zero- Offlineone- Online
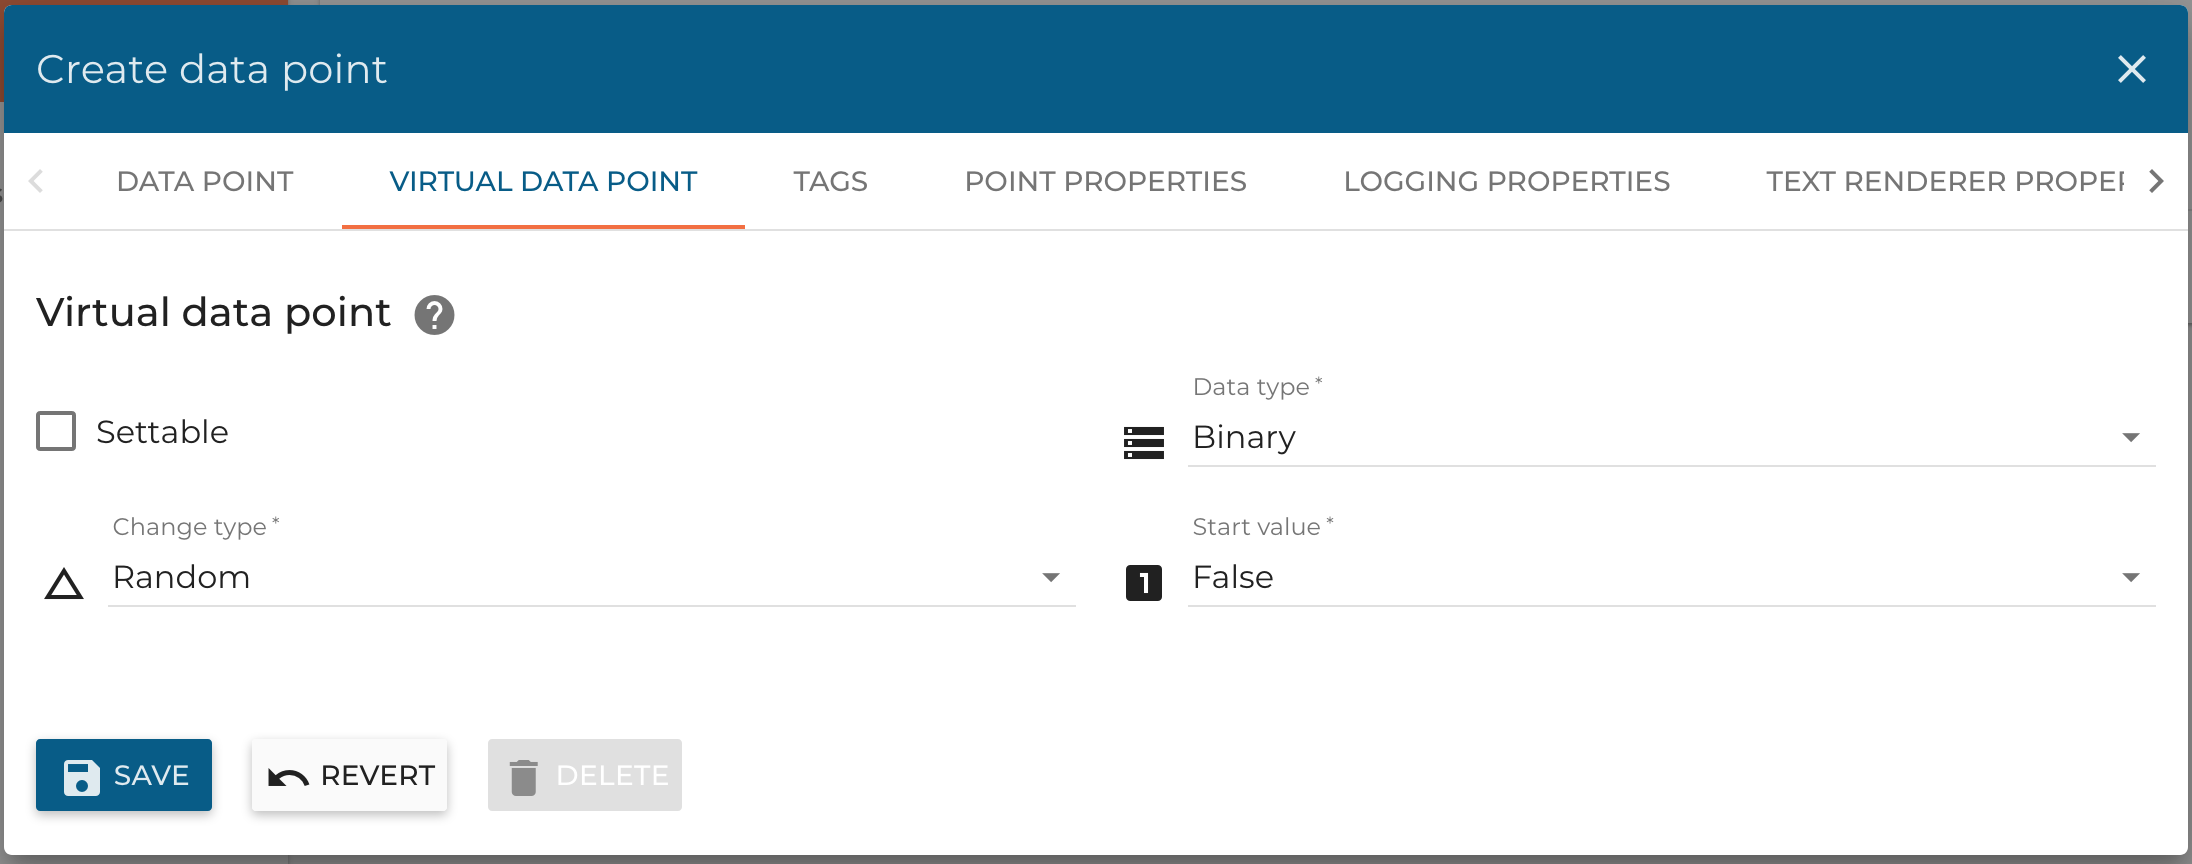
This data point will change randomly between 0 and 1. Set de Device name as Unit 01, and the Name as Status
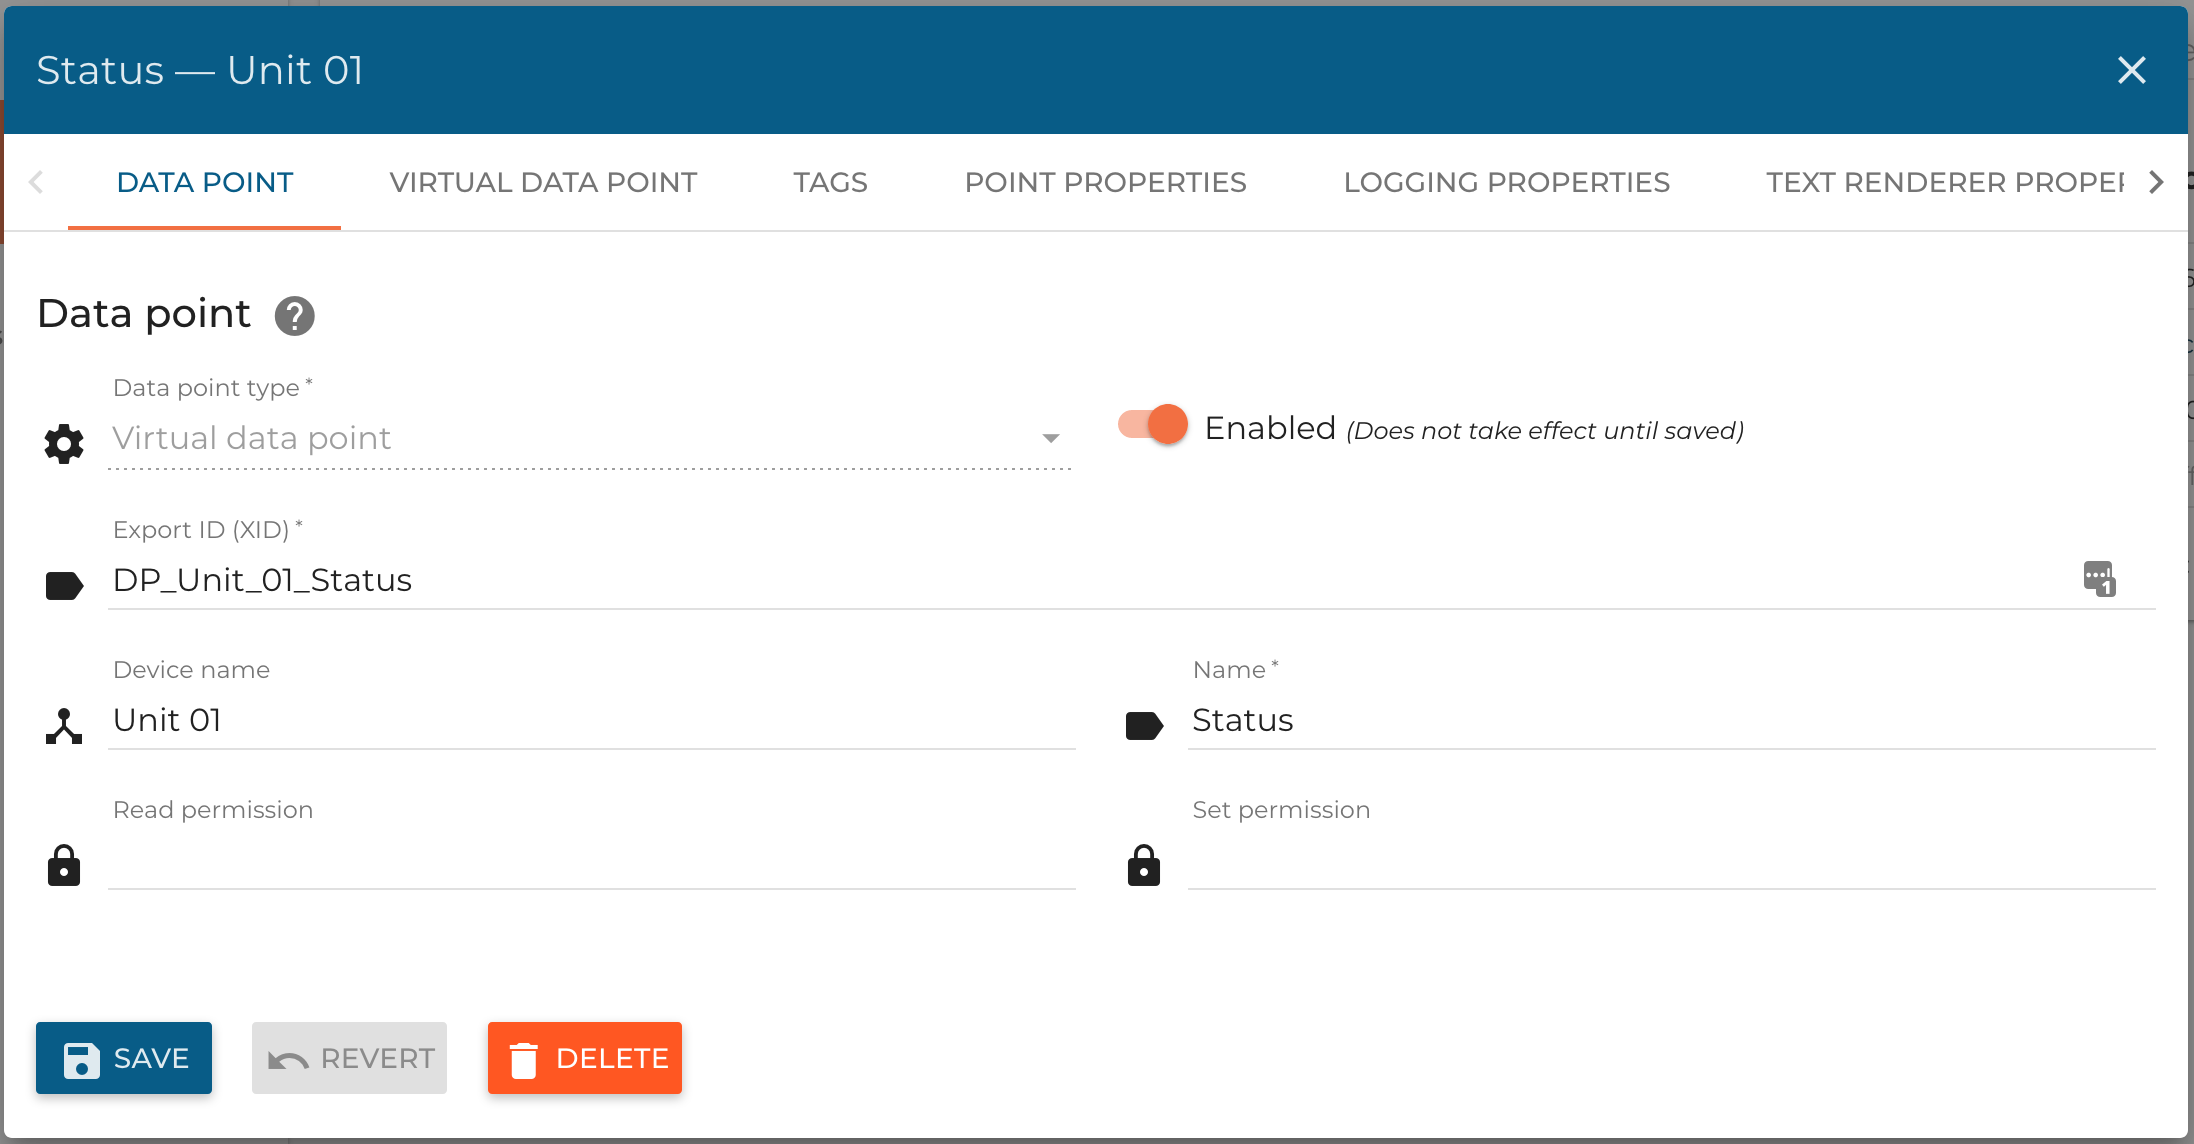
Note: The XID must be an unique value. This XID is used when exporting/importing data in Mango
Go to Virtual Data Point tab and change the values like the image below:
Now, go to Text Renderer Properties and change the values like the image below:
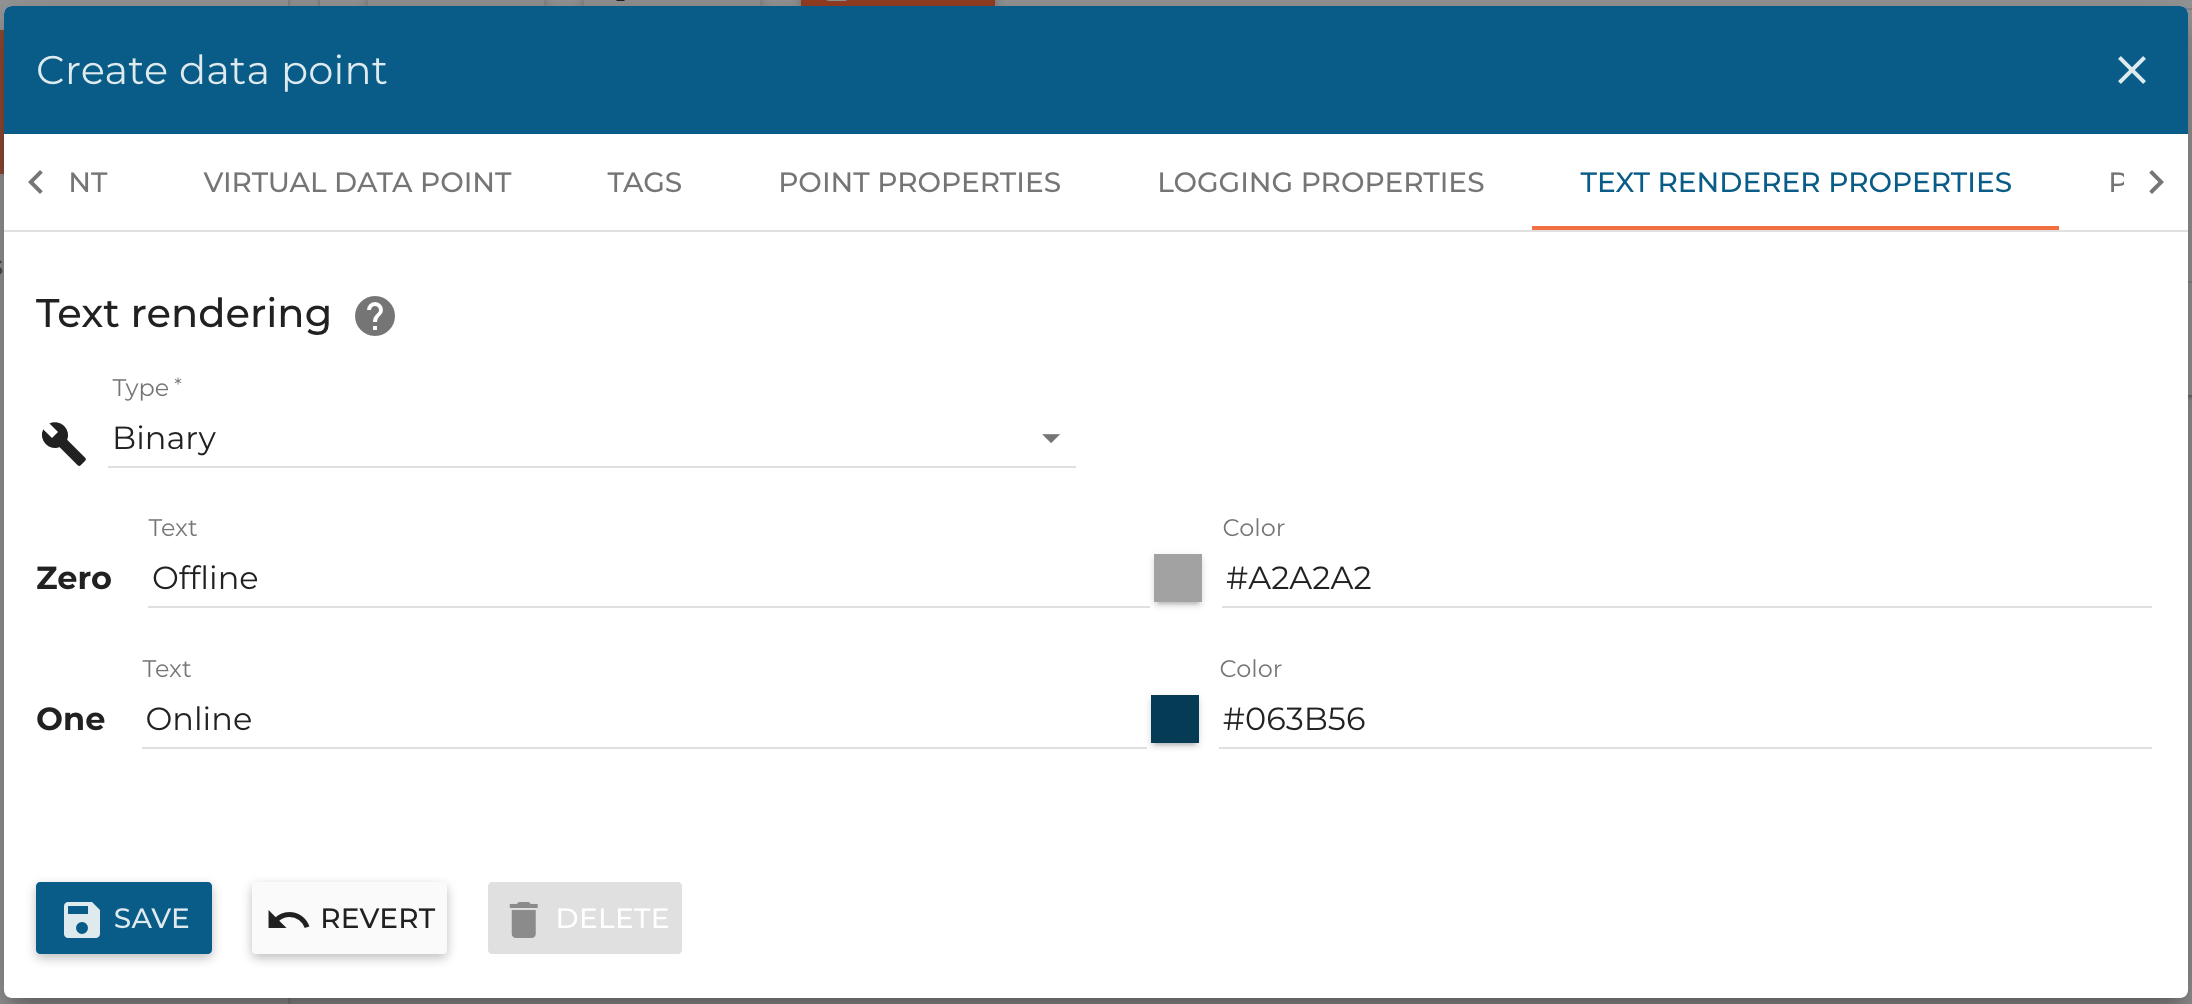
finally, click Save.
We will follow the same process for Power, kW/ton, Occupancy. At the end you will have something like this:
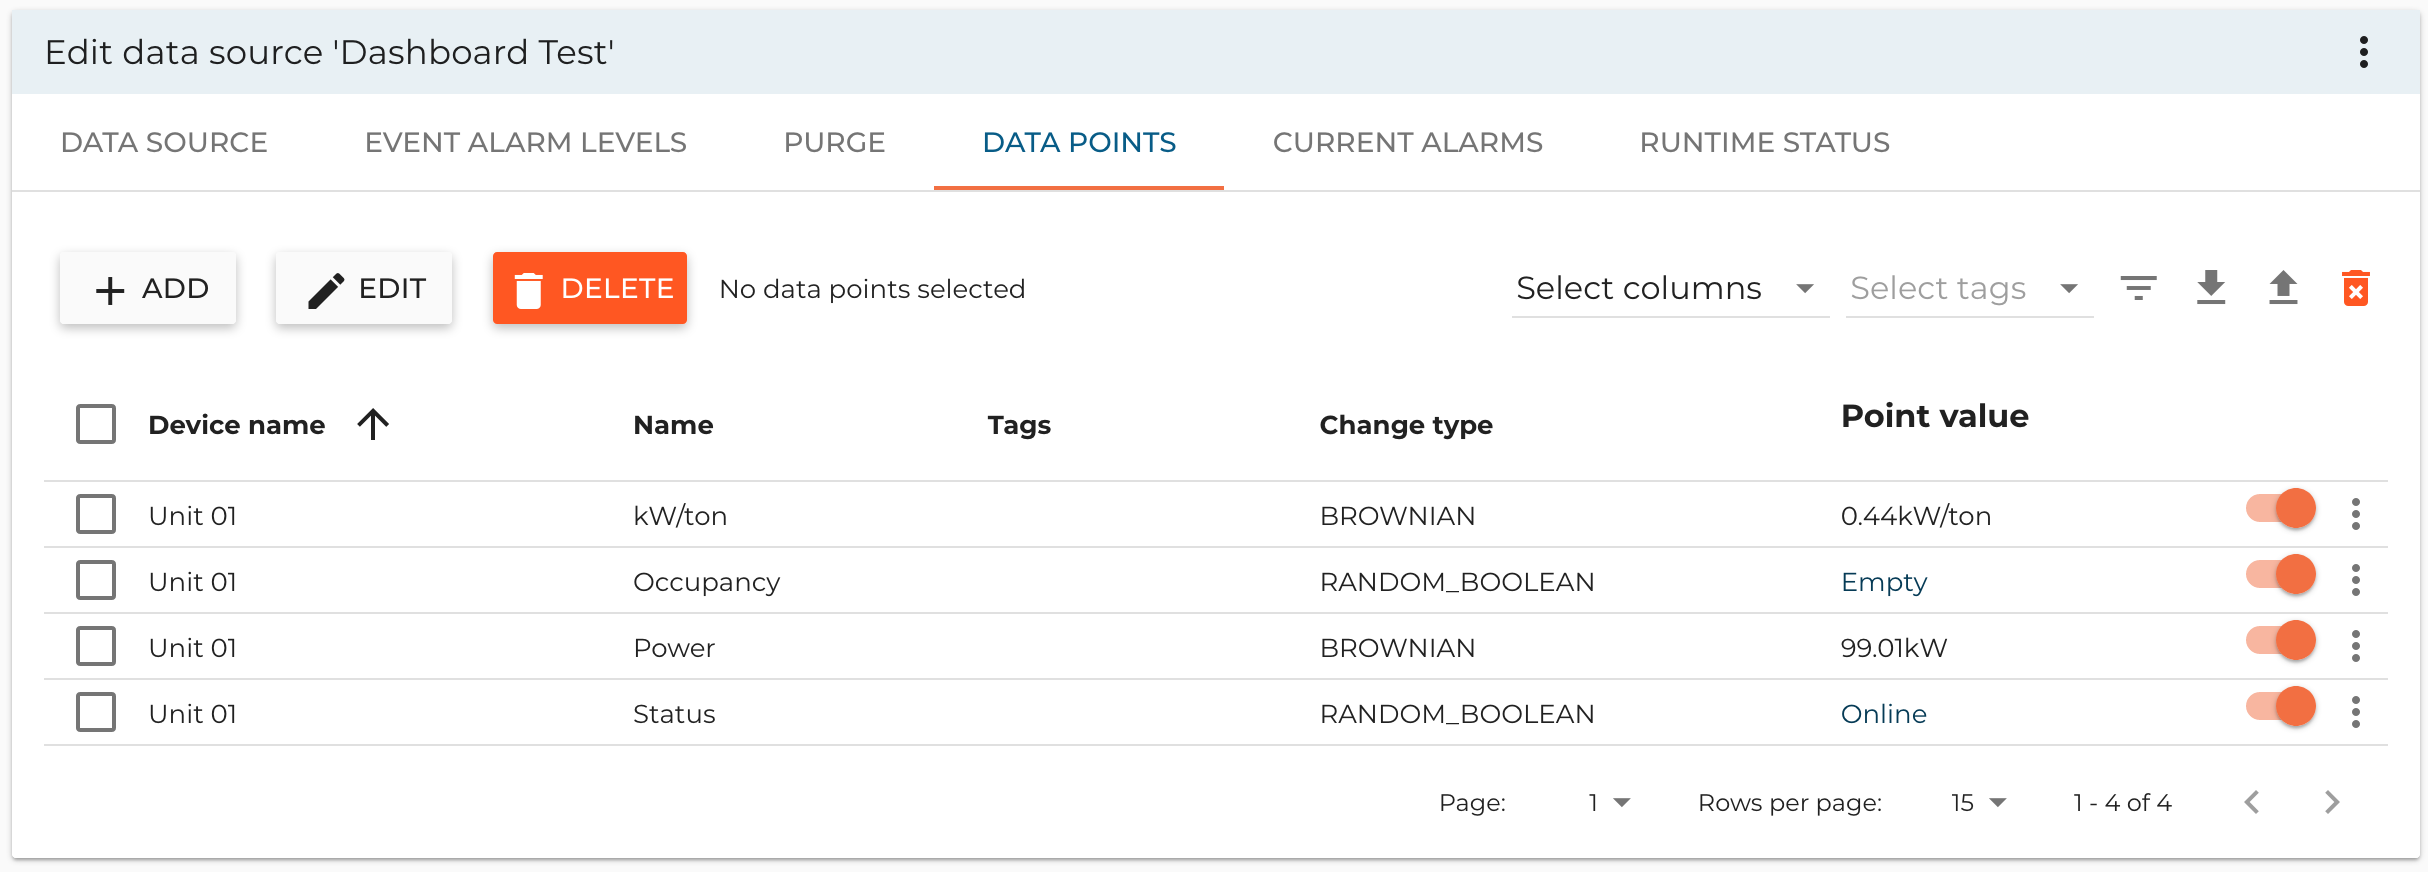
Note: You can add units to numeric data points by adding suffix in Text Renderer Properties, or by changing the unit in Point Properties.
Now that we have the first unit, let's create 9 more units so we can properly test our UI. On the data points table, Click download CSV icon:

You will get a CSV file like this one.
In this file, you can generate copies from Unit 01 data points and create 9 more units. Change the next columns for each one of the copies:
- action =
CREATE - originalXid =
DP_Unit_{number of the unit}_{name of the data point} - deviceName =
Unit {number of the unit} - xid =
DP_Unit_{number of the unit}_{name of the data point}
Once you create the copies and change the values of the columns accordingly, you will have a CSV file like this one
Finally, Click on Upload CSV icon and load the updated CSV.

And that's it, you have some basic data points for testing.
Now, we need some place to store the location of each unit. In this case, we will use the JSON store. So, go to the JSON store and create a Units item, like the image below:
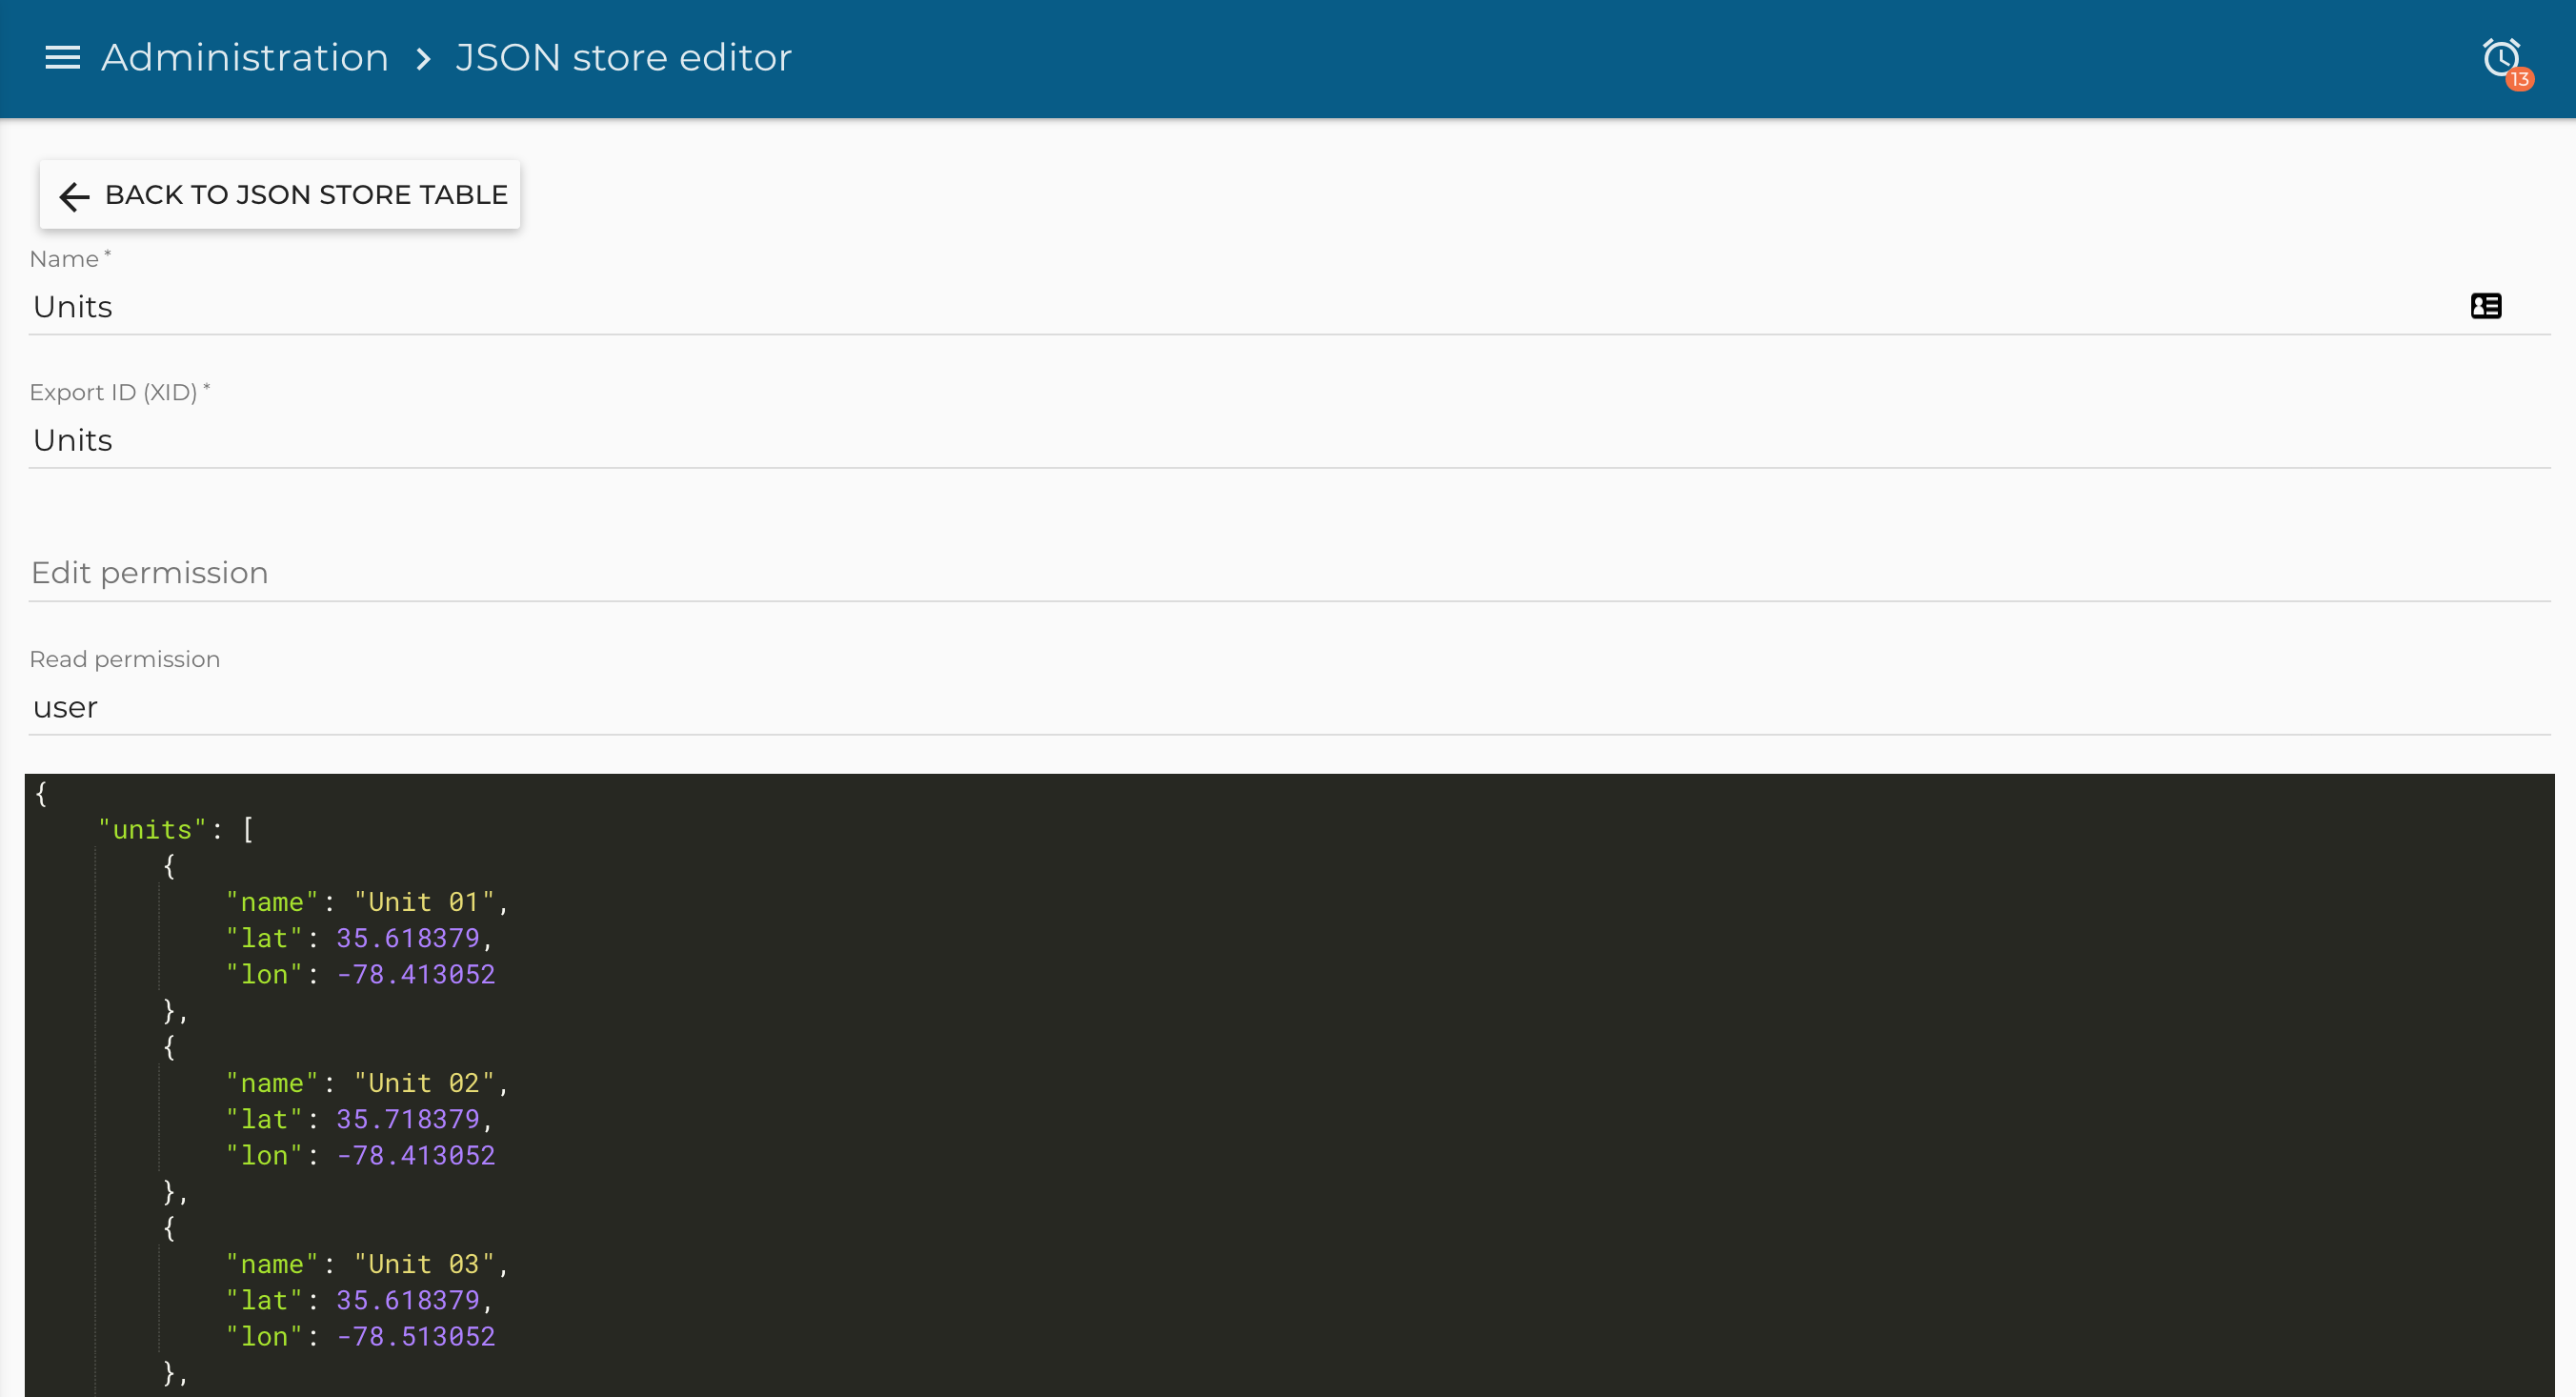
The json will be like this one:
{
    "Unit 01": {
        "name": "Unit 01",
        "lat": 35.618379,
        "lon": -78.413052
    },
    "Unit 02": {
        "name": "Unit 02",
        "lat": 35.718379,
        "lon": -78.413052
    },
    "Unit 03": {
        "name": "Unit 03",
        "lat": 35.618379,
        "lon": -78.513052
    },
    "Unit 04": {
        "name": "Unit 04",
        "lat": 35.818379,
        "lon": -78.413052
    },
    "Unit 05": {
        "name": "Unit 05",
        "lat": 35.118379,
        "lon": -78.813052
    },
    "Unit 06": {
        "name": "Unit 06",
        "lat": 35.218379,
        "lon": -78.713052
    },
    "Unit 07": {
        "name": "Unit 07",
        "lat": 35.318379,
        "lon": -78.613052
    },
    "Unit 08": {
        "name": "Unit 08",
        "lat": 35.418379,
        "lon": -78.513052
    },
    "Unit 09": {
        "name": "Unit 09",
        "lat": 35.518379,
        "lon": -78.413052
    },
    "Unit 10": {
        "name": "Unit 10",
        "lat": 35.618379,
        "lon": -78.313052
    }
}
Note the name attribute must be equal to the deviceName in the data points, so we can connect this information with the data points.
Now we have all the information needed to start the development of the dashboard.