Mango Allows you to develop custom views as its frontend is based on AngularJS. So, We can code custom components to create almost anything that We can imagine.
Now, to do this, We have to follow the next steps:
- Create an AngularJS module file to be loaded by Mango.
- Load the module on UI Setting on Mango.
- Create components that we will use.
- Load components in the module.
- Add a menu item for our component.
Create AngularJS module

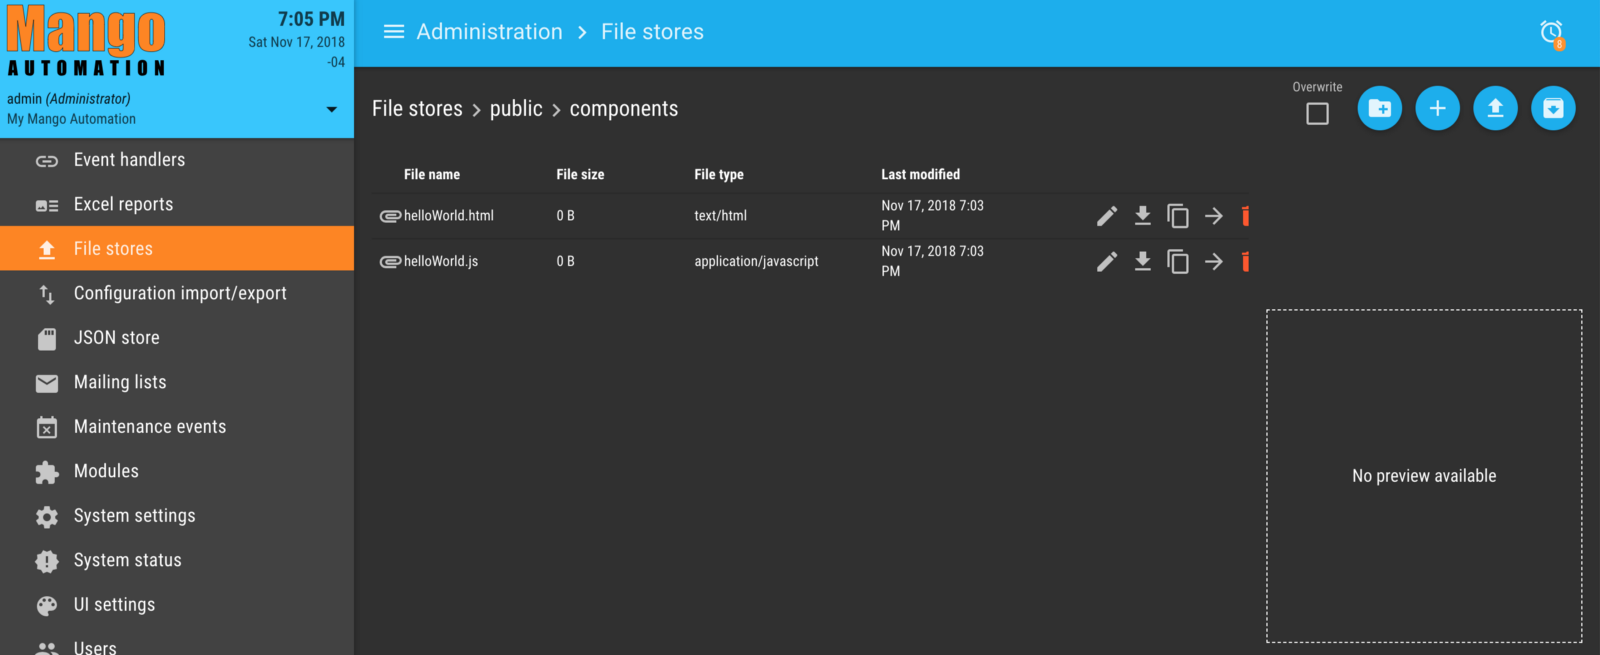
For this step we will need to go to Administration > File Stores in the menu. The File Stores allows us to upload any file that we want and Mango will store them for you.
By default, Mango create a default folder, but We will move to public folder by clicking File stores:

Then you can select public folder, and in this folder we will create a mainModule.js file with the next code:
define([
    'angular',
    'require'
],
function(angular, require) {
'use strict';
var mainModule = angular.module('mainModule', ['maUiApp']);
mainModule.config(['maUiMenuProvider', function(maUiMenuProvider) {
    maUiMenuProvider.registerMenuItems([]);
}]);
return mainModule;
});
This is a first structure for the module. I will talk about maUIMenuProvider later.
Load the module on UI Setting
In this step you will need to go to Administration > UI settings, on miscellaneous settings section, on User module URL you select the mainModule.js file that We previously created.
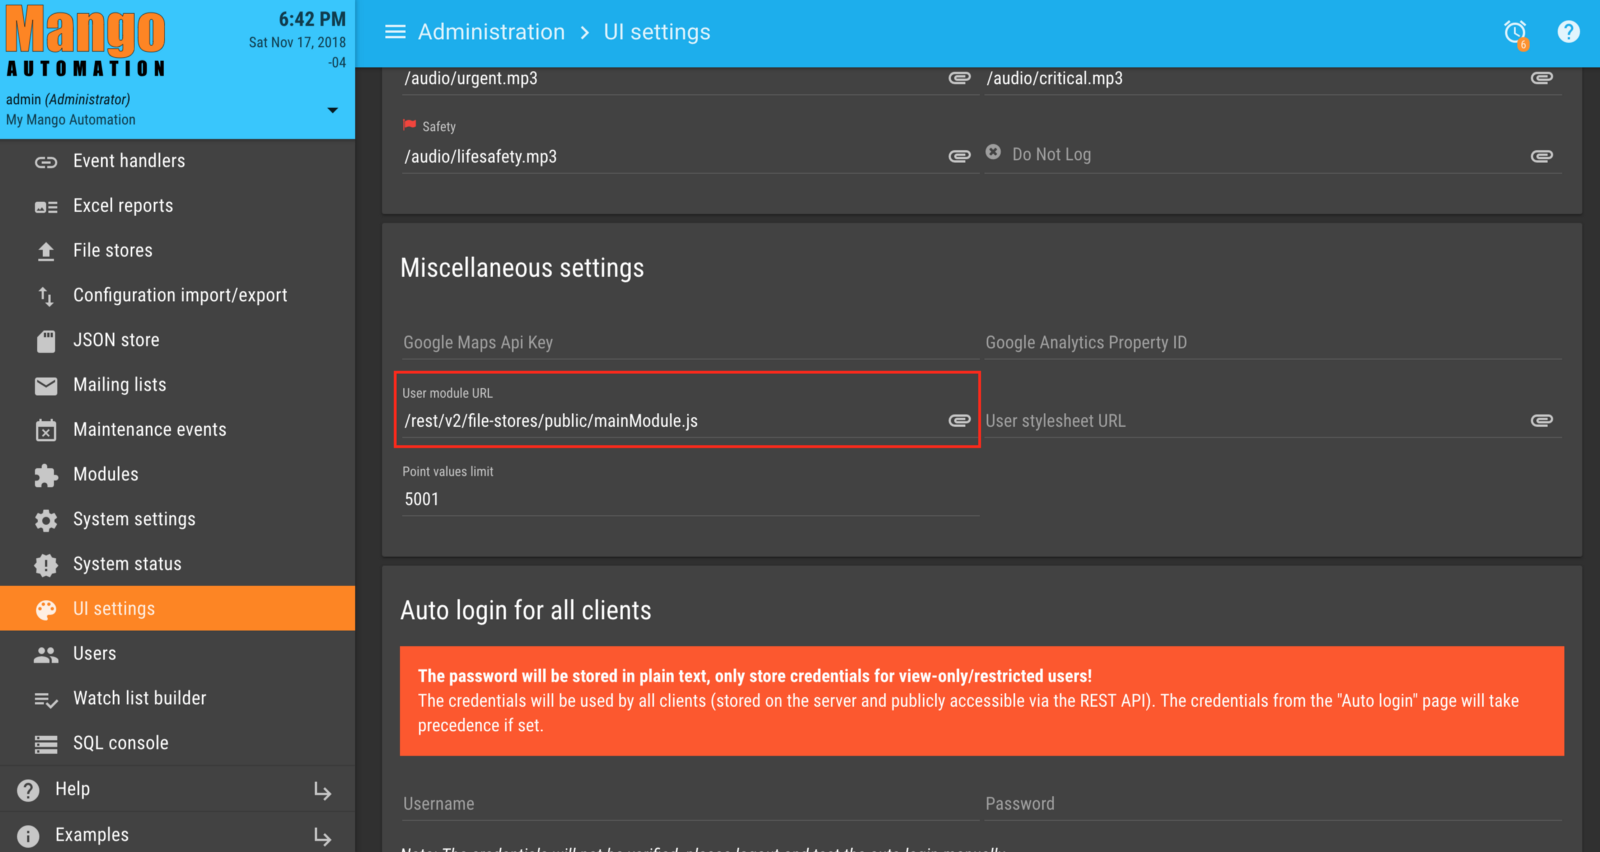
NOTE: Don't forget to click save button after you select the module file.
Create components that we will use
The next thing that We will do is to create our first AngularJS component in Mango. Inside public folder We will create a components folder, and We will store our components inside of it. Let's call it helloWorld.js and the html template will be helloWorld.html.
In the helloWorld.js file We will add the next code:
define(['angular', 'require'], function(angular, require) {
'use strict';
HelloWorldController.$inject = ['$scope'];
function HelloWorldController($scope) {
this.$onInit = () => {
        this.helloWorld = 'Hola Mango';
    };
}
return {
    bindings: {},
    controller: HelloWorldController,
    templateUrl: require.toUrl('./helloWorld.html')
};
});
and in the helloWorld.html file you can add whatever you want, for testing purposes, I will use the next code.
<md-card>
    <md-card-content>
        <h1>{{$ctrl.helloWorld}}</h1>
    </md-card-content>
</md-card>
By default, Mango has preloaded an AngularJS material design library, which you can check in the next link. This means that you can use Material Design components that this library has to offer.
To see our view, first We need to load it in our module.
Load components in the module
In the module We will add some new code:
define([
    'angular',
    'require',
    './components/helloWorld.js'
],
function(angular, require, helloWorld) {
'use strict';
var mainModule = angular.module('userModule', ['maUiApp']);
    mainModule.component('helloWorld', helloWorld);
    mainModule.config(['maUiMenuProvider', function(maUiMenuProvider) {
        maUiMenuProvider.registerMenuItems([
            {
                name: 'ui.helloWorld',
                url: '/hello-world',
                menuText: 'Hello World',
                menuIcon: 'accessibility_new',
                abstract: true,
                menuHidden: false,
                weight: 996,
            },
            {
                name: 'ui.helloWorld.home',
                url: '/home',
                template: '<hello-world></hello-world>',
                menuIcon: 'fa-home',
                menuText: 'Home',
                weight: 997,
                params: {
                    noPadding: false,
                    hideFooter: false,
                },
            },
        ]);
    }]);
    return mainModule;
});
- First, We add the
helloWorldcomponent with this linemainModule.component('helloWorld', helloWorld); - Next, We have two items in the
maUiMenuProviderwhich create the routes, and buttons on the menu.
The first item will create a new section on the menu. the name key has to be unique because the maUiMenuProvider will use it as an identifier, We will use name: 'ui.helloWorld' in this case.
The second item will create a route for the component inside of helloWorldsection. As you can see the identifier is name: 'ui.helloWorld.home' because it is a child of the first item.
Note: On menuIcon you can use Font Awesome icons or Material Icons.
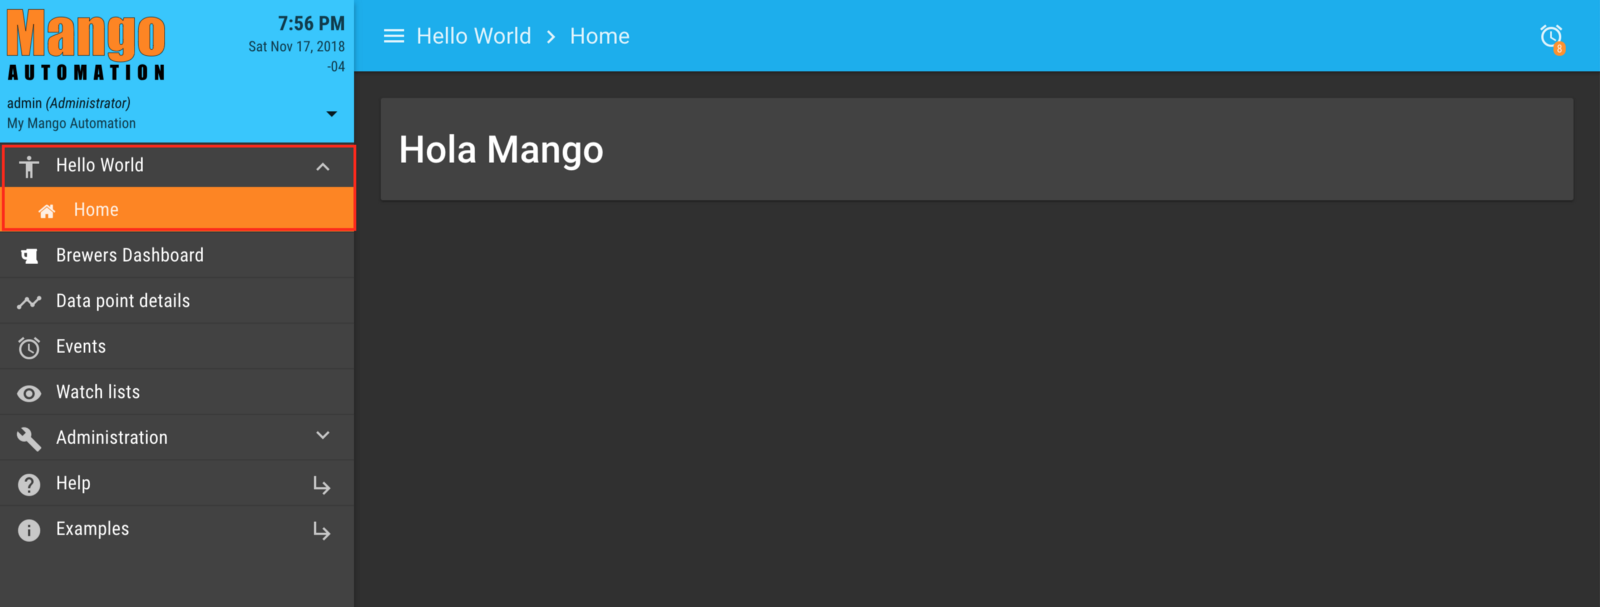
Finally, We will get this view:
And that's it, now you can use your own component in Mango!